Boost Email Deliverability: How to Configure Domain Key/DKIM in NetSuite
Jonathan Potter
Are you facing issues with NetSuite emails appearing as if they are sent from “system@netsuite.com“? To resolve this problem and ensure that your emails originate from the correct address, it’s crucial to establish your company’s Domain Key in NetSuite. This guide will walk you through the steps to configure Domain Key/DKIM in NetSuite, enabling your emails to display the intended sender’s address.
What is DKIM and Why is it Important?
DKIM (DomainKeys Identified Mail) is essential in NetSuite for ensuring the authenticity and integrity of email messages sent from your domain. By digitally signing outgoing emails with a unique cryptographic key, DKIM allows the recipient’s mail servers to verify that the email indeed originated from your domain and hasn’t been tampered with during transit. This verification process plays a crucial role in email deliverability and reducing the chances of your emails being flagged as spam or phishing attempts.
Requirements:
To streamline the process, gather the following materials beforehand:
DNS Entry: Access to your domain provider or domain host, such as GoDaddy.com, where you can make DNS changes.
Instructions to Establish DKIM in NetSuite:
Log in to NetSuite using your Administrator credentials.
From the NetSuite dashboard, navigate to the Classic Center by selecting the “Classic Center” option associated with the admin role.
Configuring Domain Key in NetSuite:
In the Classic Center, find the navigation menu and go to Setup > Company > Email Preferences.
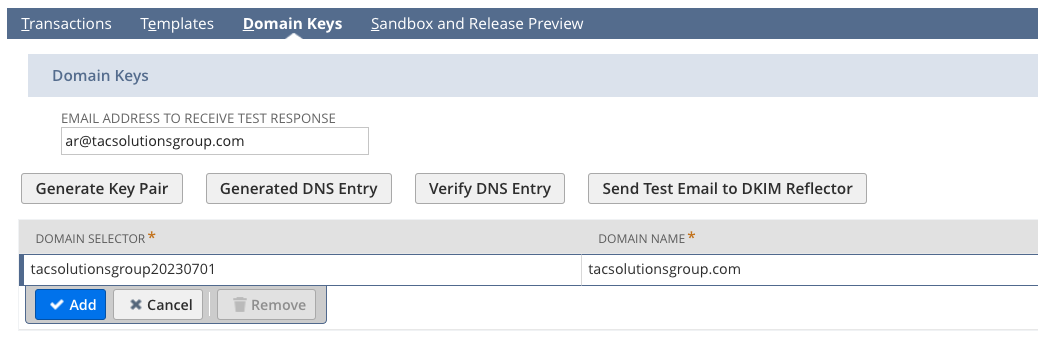
Once on the Email Preferences page, click on the Domain Keys subtab.
In the Email Address to Receive Test Response field, enter your own email address (e.g., tbd@yourdomain.com) to receive test responses.
Setting Up Domain Key in NetSuite:
In the first line, set the value for Domain Selector following the recommended naming convention: [Company Name][YYYYMMDD]. For example, use “mydomain20221219.”
Set the value for Domain Name as your company domain. Only include the values that appear on the right side of the “@” character.
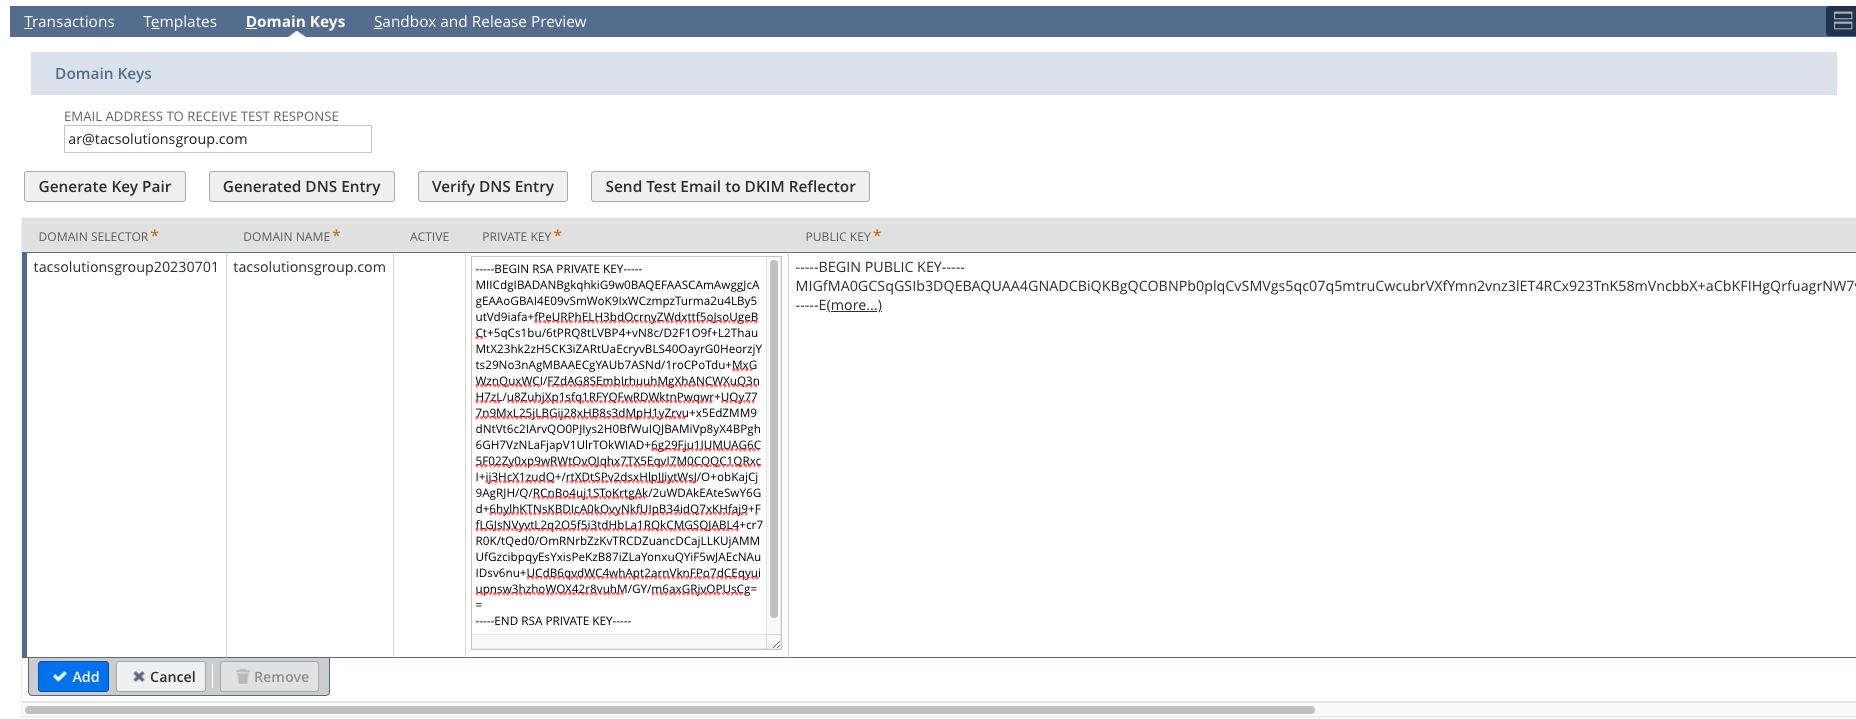
While on the same line, click the Generate Key Pair button to generate private and public key values.
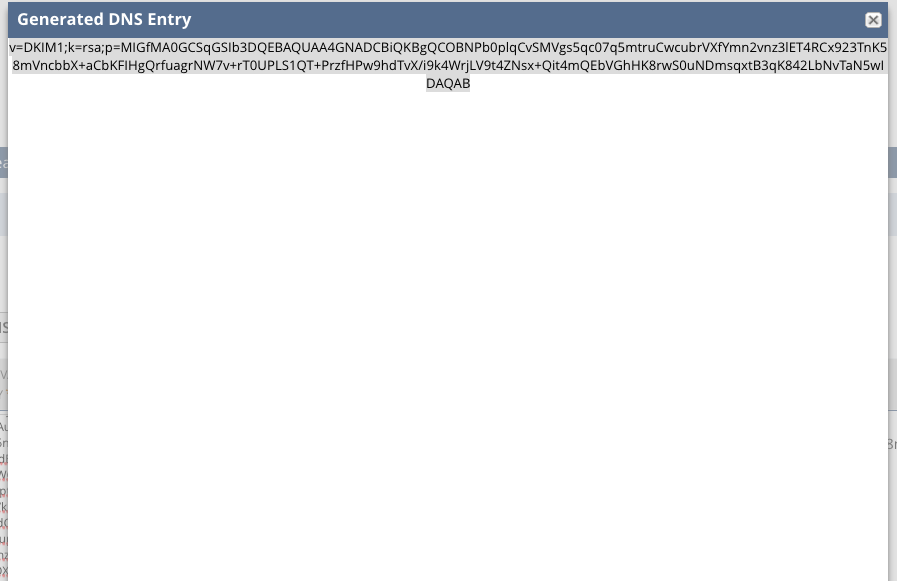
Still on the same line, click the Generate DNS Entry button. Copy the entire generated DNS Entry string for use in your domain provider settings.
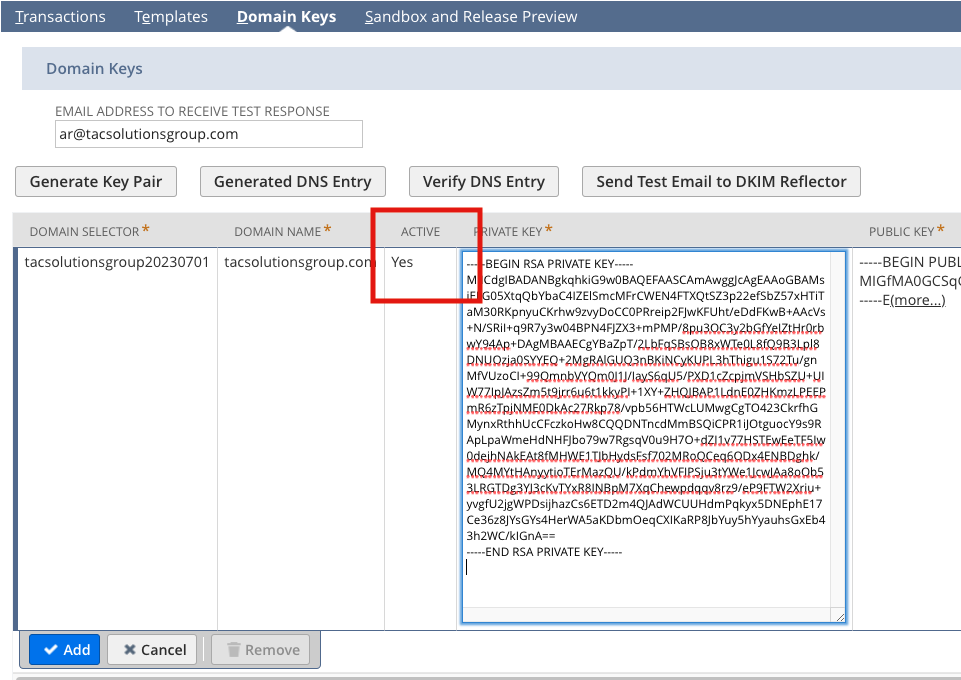
Check the checkbox under Active and click Save to save your email preferences.
Configuring DNS Entry in Domain Provider:
Log in to your domain provider account and navigate to the DNS settings.
Return to your NetSuite account and access the administration panel.
Go to Setup > Company > Email Preferences and click on the Domain Keys subtab.
Click Verify DNS Entry to initiate the verification process.
Once initiated, click Send Test Email to DKIM Reflector.
Check your email inbox for a confirmation email indicating the completion of your setup.
Congratulations! You have successfully configured NetSuite DKIM (DomainKeys Identified Mail), ensuring that emails generated from NetSuite display your preferred domain. This establishes authenticity and builds trust with your recipients. Enjoy a professional and consistent email communication experience with NetSuite. If you’re eager to explore the capabilities of NetSuite’s ERP system, we invite you to get in touch with us to learn more about NetSuite’s capabilities. If you have further questions or want to schedule a conversation regarding NetSuite DKIM, Contact Us.
Our combined experiences in diverse industries provide us with unique insights allowing our NetSuite Consultants to provide solutions to multifaceted problems.It has been our experience that often times people look for the easiest solution instead of facing the problems head-on. This creates manual workaround and loss of man hours that contribute to increased labor costs to resolve systematic problems.
Request a demo
Fill out the form below and our team will be in touch shortly.