


Are you interested in making your financial processes more efficient and optimizing your NetSuite experience? Well, the key lies in connecting bank parsers and setting up bank statement imports. These processes allow for your organization to import bank activity daily, thus significantly reducing time to close at month end. In this guide we will walk you through each step of the process to help you successfully implement this functionality within NetSuite.
Section 1: Bank Parser Overview
NetSuite bank statement parser functionality is a tool for enhancing management. However, it all starts with understanding the requirements from your bank. Here’s how you can get started.
Step 1: Gathering Implementation Requirements from Your Bank
Before delving into the aspects, it is crucial to sit down with your bank and gather information such, as:
- The format used by your bank for its statements (Bank Data File Format): Here are some common formats you can use for bank statements; BAI2, CAMT.053.001.06 XML (ISO 20022 compliant) CSV, OFX and QFX.
- Bank Data Code Breakdown: Familiarize yourself with the codes used in your bank statements to comprehend their meanings.
- Bank Connectivity Credentials: Collect details, like the URL, username, password, host key type, port number download filename pattern, bank server time zone, date format preferences and download directory. Your bank will typically provide a temporary password initially which you’ll need to change on. Make sure to keep this information secure.
- UAT Test Details: If applicable ensure that you have access to test environments for trial runs before implementation.
- Bank Implementation Guides: Some banks offer documentation that can assist you in integrating their services.
- 1 Month History Bank Statement: It’s crucial to retrieve a bank statement file from the month to ensure that all relevant codes are accurately mapped. This step is important because not all codes may be applicable to your situation; analyzing your history will help identify which fields need to be coded for importing from the bank statement.
Section 2: Getting Your Keys Ready
To ensure authentication it is crucial to set up your public keys properly. Follow these steps.
Step 2: Generating Keys and Uploading Them to NetSuite
- Download PuttyGen (link here).
- Open downloads and click on the PuttyGen application.

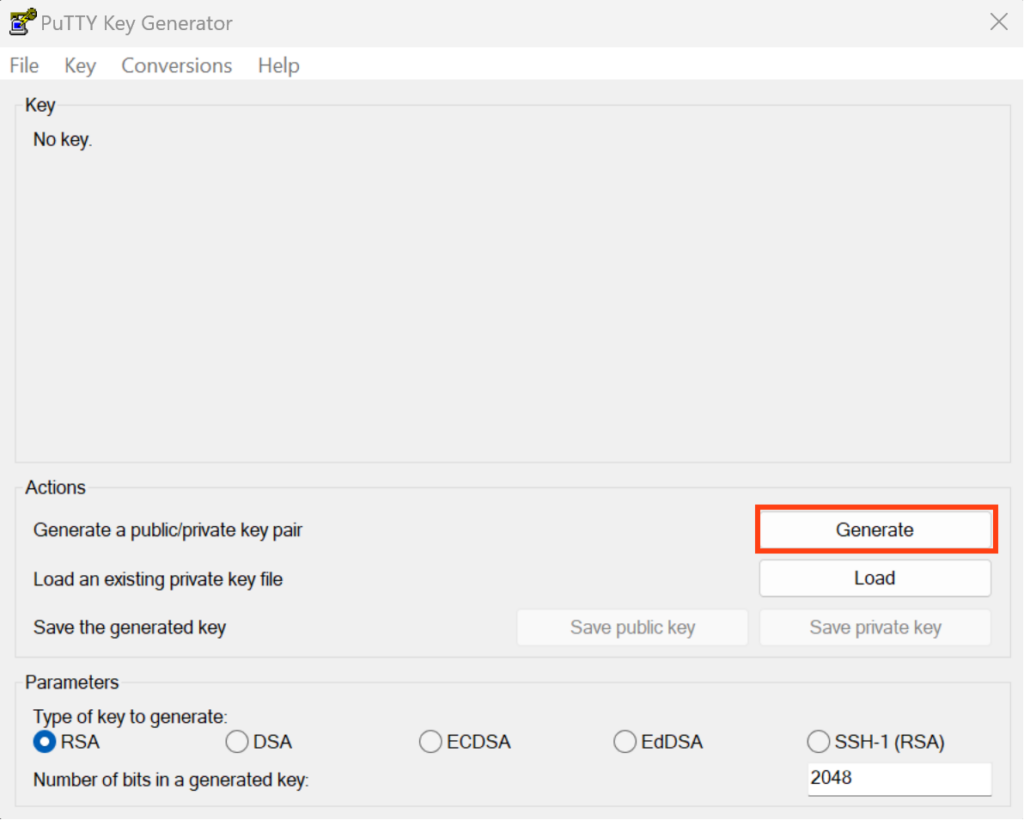
- Select your parameters then click Generate to generate your key pair. (Typical Parameters are RSA, number of bits in a generated key: 2048).
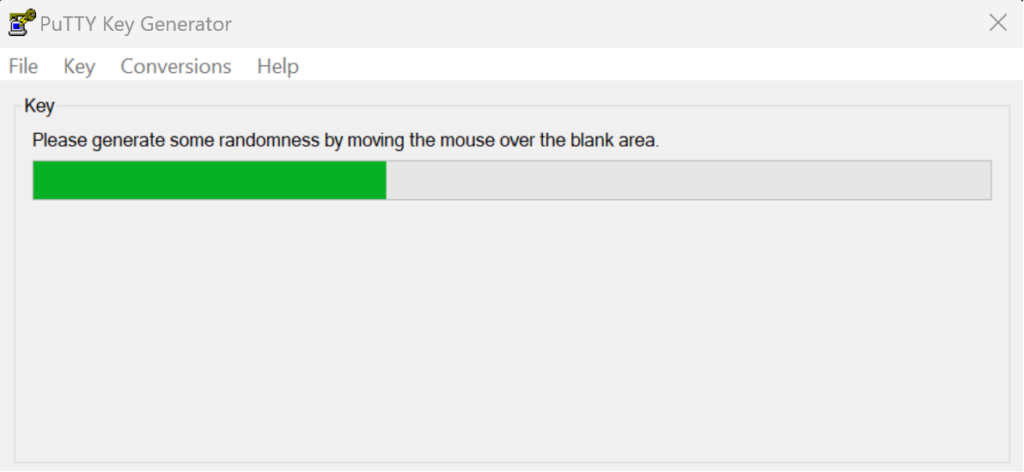
- You will randomly move your mouse across the blank area to generate a random SSH Key.
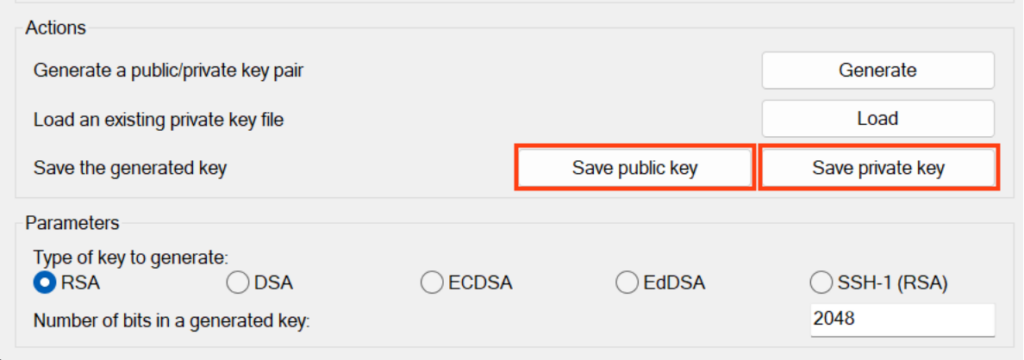
- Once the Key Pair has been generated, click Save Private Key and Public Key. Store in a folder that you named “Keys”. (Best practice is to save it in the file cabinet of NetSuite with secure access).
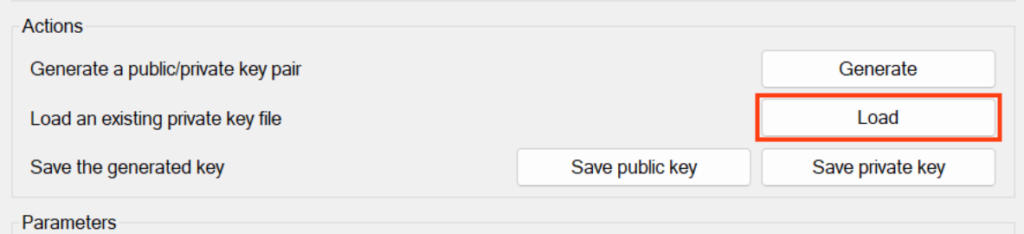
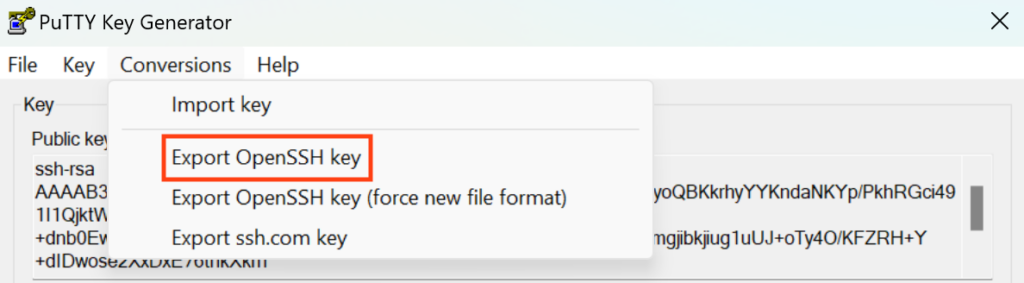
- If you used RSA Parameter, click Load and upload Private keys that you just saved. You will then select Conversions > Export OpenSSHKey. Save the Open SSHKey. This is the key that you will upload into NetSuite.
- Once you have generated your pair, open NetSuite and go to Setup > Company > Keys.
- Enter the name for your key. Provide a description.
- Upload the OpenSSHKey file that you generated as part of the key pair process and select it for use.
- If necessary, add any audience restrictions.
- Save the configuration.
- Share the OpenSSH Key with the Bank.
Section 3: Installing the Bank Statement Parser Suite Bundle and Auto Bank Statement Import SuiteApp
Now that you have set up your keys correctly it’s time to install the Bank Statement Parser bundle. Follow these steps:
Step 3: Install the Bank Statement Parser Bundle
- Before you install the Bank Statement Parsers SuiteApp, go to Setup > Company > Setup Tasks > Enable Features, and then click the SuiteCloud tab. Make sure that the following features are enabled on your account:
- Custom Records
- Client SuiteScript
- Server SuiteScrip
- Navigate to Customization > Suite Bundler > Search & Install Bundles.
- Search for Bundle ID 293699 Bank Statement Parsers.
- Click Install and follow the installation process.
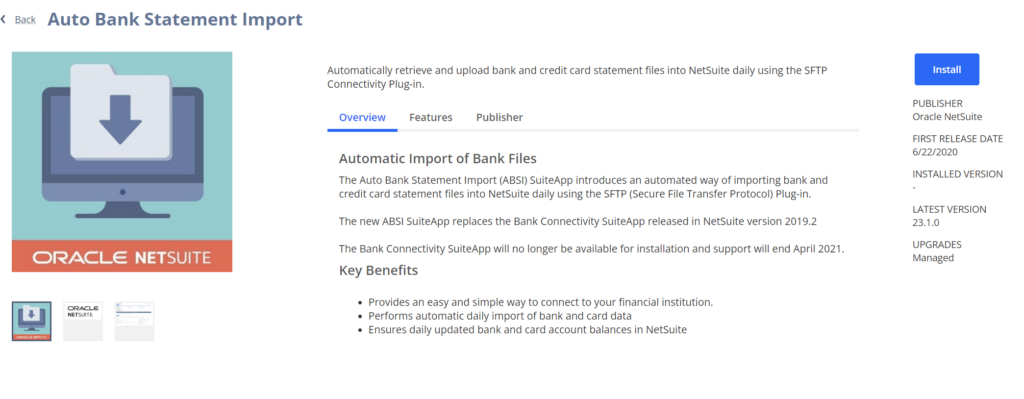
After you install the Bank Statement Parser Suite Bundle, you will need to install the Auto Bank Statement Import SuiteApp.
- Click Customizations > SuiteCloud Development > SuiteApp Marketplace
- Search for Auto Bank Statement Import. (pictured below)
- Click Install.
Section 4: Creating a Financial Institution
Next, you will create the financial institution in NetSuite.
Step 4: Create a Financial Institution
- Go to Setup > Accounting > Financial Institution.
- Fill in the institution’s name and provide a description.
- Save the information.
Section 5: Configuring Format Profiles in NetSuite
Now let’s create format profiles that align with your bank statement format.
Step 5: Create Format Profile in NetSuite
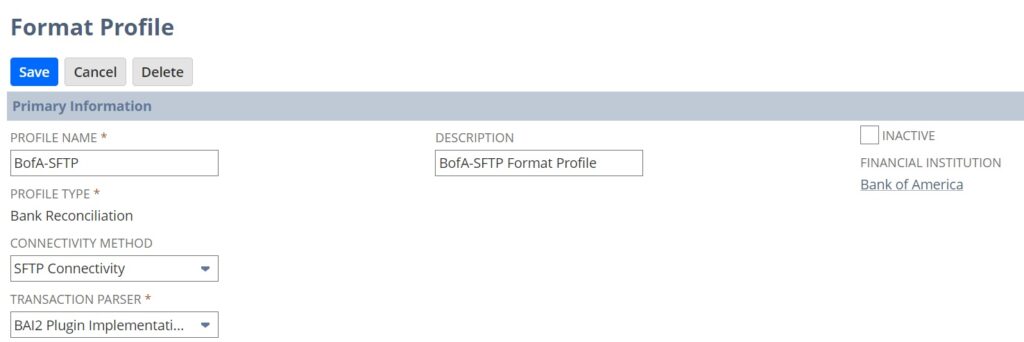
Step 5.1: Primary Information Section
- Access Format Profile: Configuration Tab in the Financial Institution and click Add.
- Fill in the profile name, description, and select the connectivity method and transaction parser.
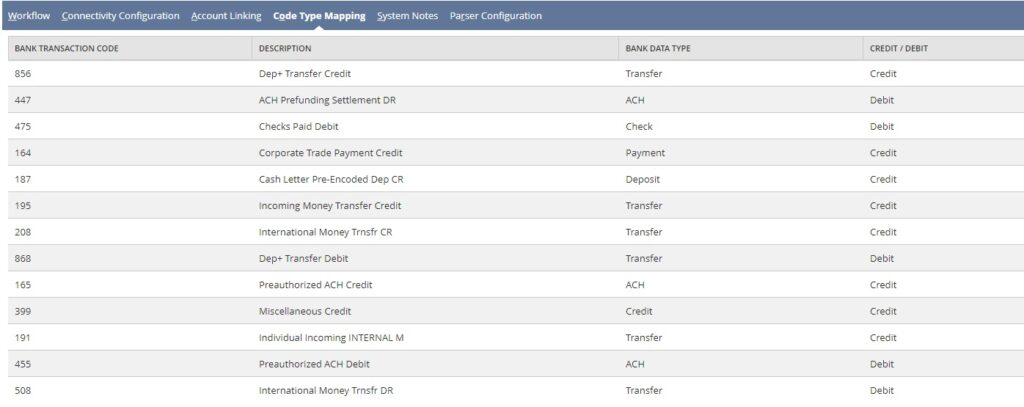
- Step 5.2: Account Linking Section
- Connect your account ID to the NS GL account by entering the account number.
- Map bank transaction codes, descriptions, bank data types and credit/debit information accordingly based on your statements and bank data breakdowns.
-
Step 5.4: Connectivity Configuration Section
- Provide the URL, username, digital certificate, or private key ID (choose the key from step 2) password, host key, host type, port, download filename pattern, bank server time zone (GMT) date format for reserved word download directory and download timeout.
- Note: The bank will provide all configuration details except for the certificate or private key and your initial password. You may need to change your password once the bank sets up a temporary one.
- Click Save.
Section 6: Testing the Import Process
Now, let’s proceed with testing the import process.
Step 6: Test Import Process
- Request test files from the bank for integration purposes.
- Once you receive confirmation from the bank that they have sent over the test files, initiate a data pull by accessing the financial institution format profile. Click on Submit, in the connectivity configuration section. Then click Save. This will trigger an import process. You can track its status by clicking on Track Status, which will redirect you to the Bank Import History Page.
- Check the bank import status and troubleshoot any issues.
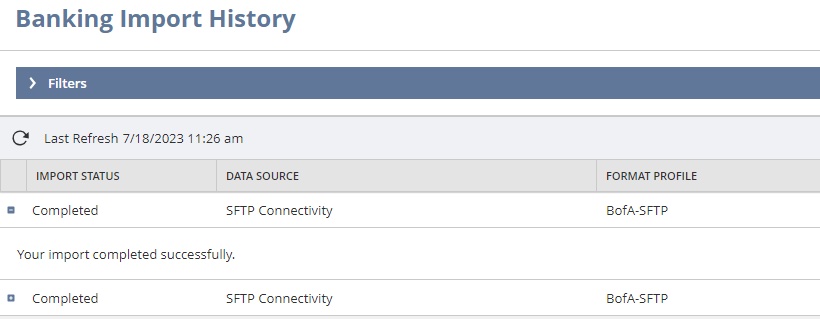
- To see all the files that have been imported visit the SFTP Connectivity File Import List. However please note that you won’t be able to view the contents of the files unless you proceed to the step.

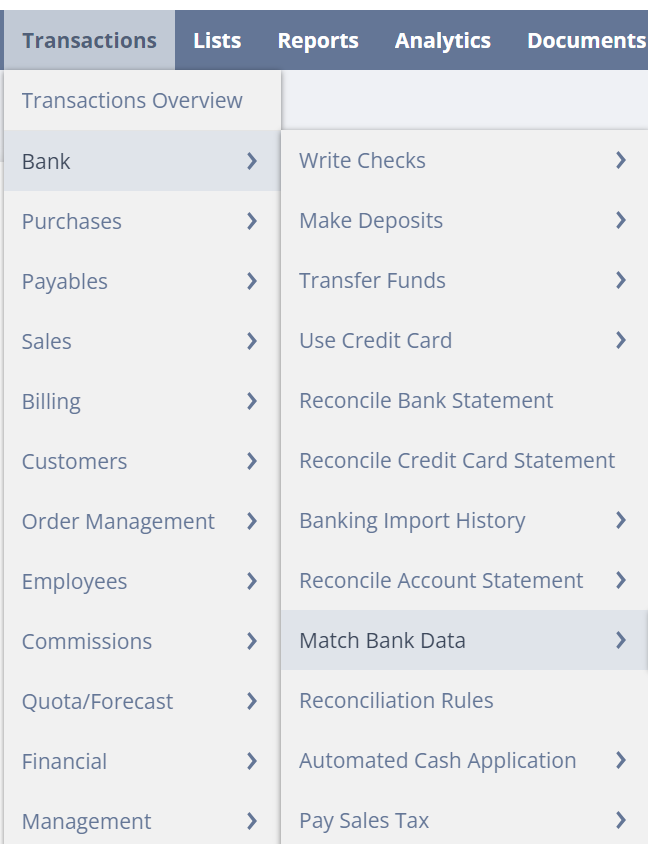
- Navigate to Transactions > Bank > Match Bank Data, to ensure that data is being populated correctly.
- Choose the bank account. Verify that data is filled in for the imported dates. On the left-hand side, you will find the imported bank statement while on the right-hand side you will see NS transactions. You can then match a bank transaction with its corresponding NS transaction by selecting both and clicking Match. Additionally on this page you can manually import a bank transaction by clicking Update Imported Bank Data.
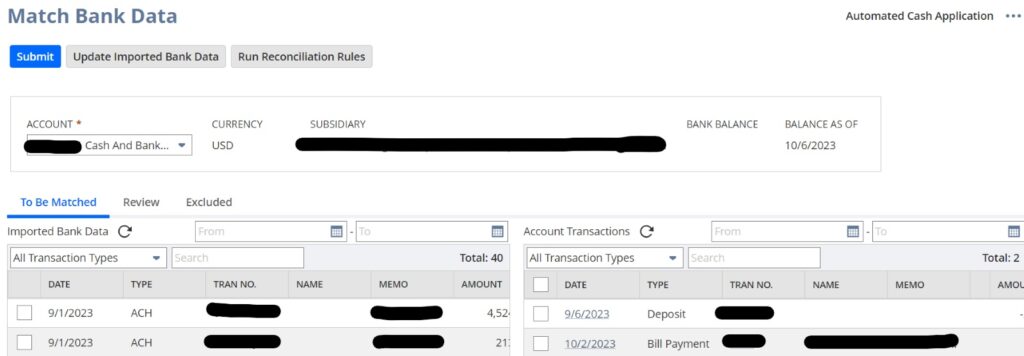
- If a transaction from your bank statement is not present, in NS simply checkmark it from the bank’s list of transactions and scroll down and choose one of these options; Add Journal Entry, Add Charge or Add Deposit. This will automatically pull details from the transaction. Allow you to generate an NS transaction easily. The bank transaction will then be matched with your created NS transaction.

You also have the option to configure matching rules and generate rules tailored to your business needs. If certain transaction matching rules aren’t applicable, to your business you can choose to disable them. For information on each topic please refer to the following links in the help center:
By referring to this guide you will have all the information you need to configure bank statement parsers and optimize your financial operations within NetSuite. Remember, it’s important to tailor these steps according to your bank requirements, for an efficient financial management system.
How TAC Can Help
Unleash the Full Potential of NetSuite’s Automatic Bank Statement Imports “ABSI” with TAC’s Solutions Group. Our team of Certified NetSuite Consultants have implemented and configured bank parsers for many of our clients with varying banks. Whether you seek clarifications or wish to schedule a consultation, we stand ready to offer comprehensive insights and explore how NetSuite’s ABSI can benefit your business. Contact us today and take your NetSuite close process to the next level.