

We discussed Streamline Your Workflow: Establishing Integration Records in NetSuite Made Easy – a vital step in enabling secure connections with external applications. Once the Integration record has been established, the next step is to validate that it works as expected. In this article we’ll demonstrate sending a simple request to a NetSuite account using Postman. This process is simple and very straightforward, allowing you to send authenticated requests and view real-time responses from NetSuite.
Pre-requisites
Before testing with Postman, ensure you have:
- Postman installed (desktop app or web).
- An active Integration record in NetSuite.
- Your NetSuite account ID.
- The authentication key, secrets, and id.
- NetSuite supports two primary authentication methods for API integration.
- Token-Based Authentication (TBA) – Use Consumer Key, Consumer Secret, Token ID, and Token Secret to authenticate requests.
- OAuth 2.0 – Use Consumer Key, Consumer Secret, and access tokens.
- Having a sandbox environment, this is not technically required but it’s highly suggested and a best practice.
- Required Enabled features and Role permissions are already setup, see Streamline Your Workflow: Establishing Integration Records in NetSuite Made Easy.
Create a HTTP Request in Postman
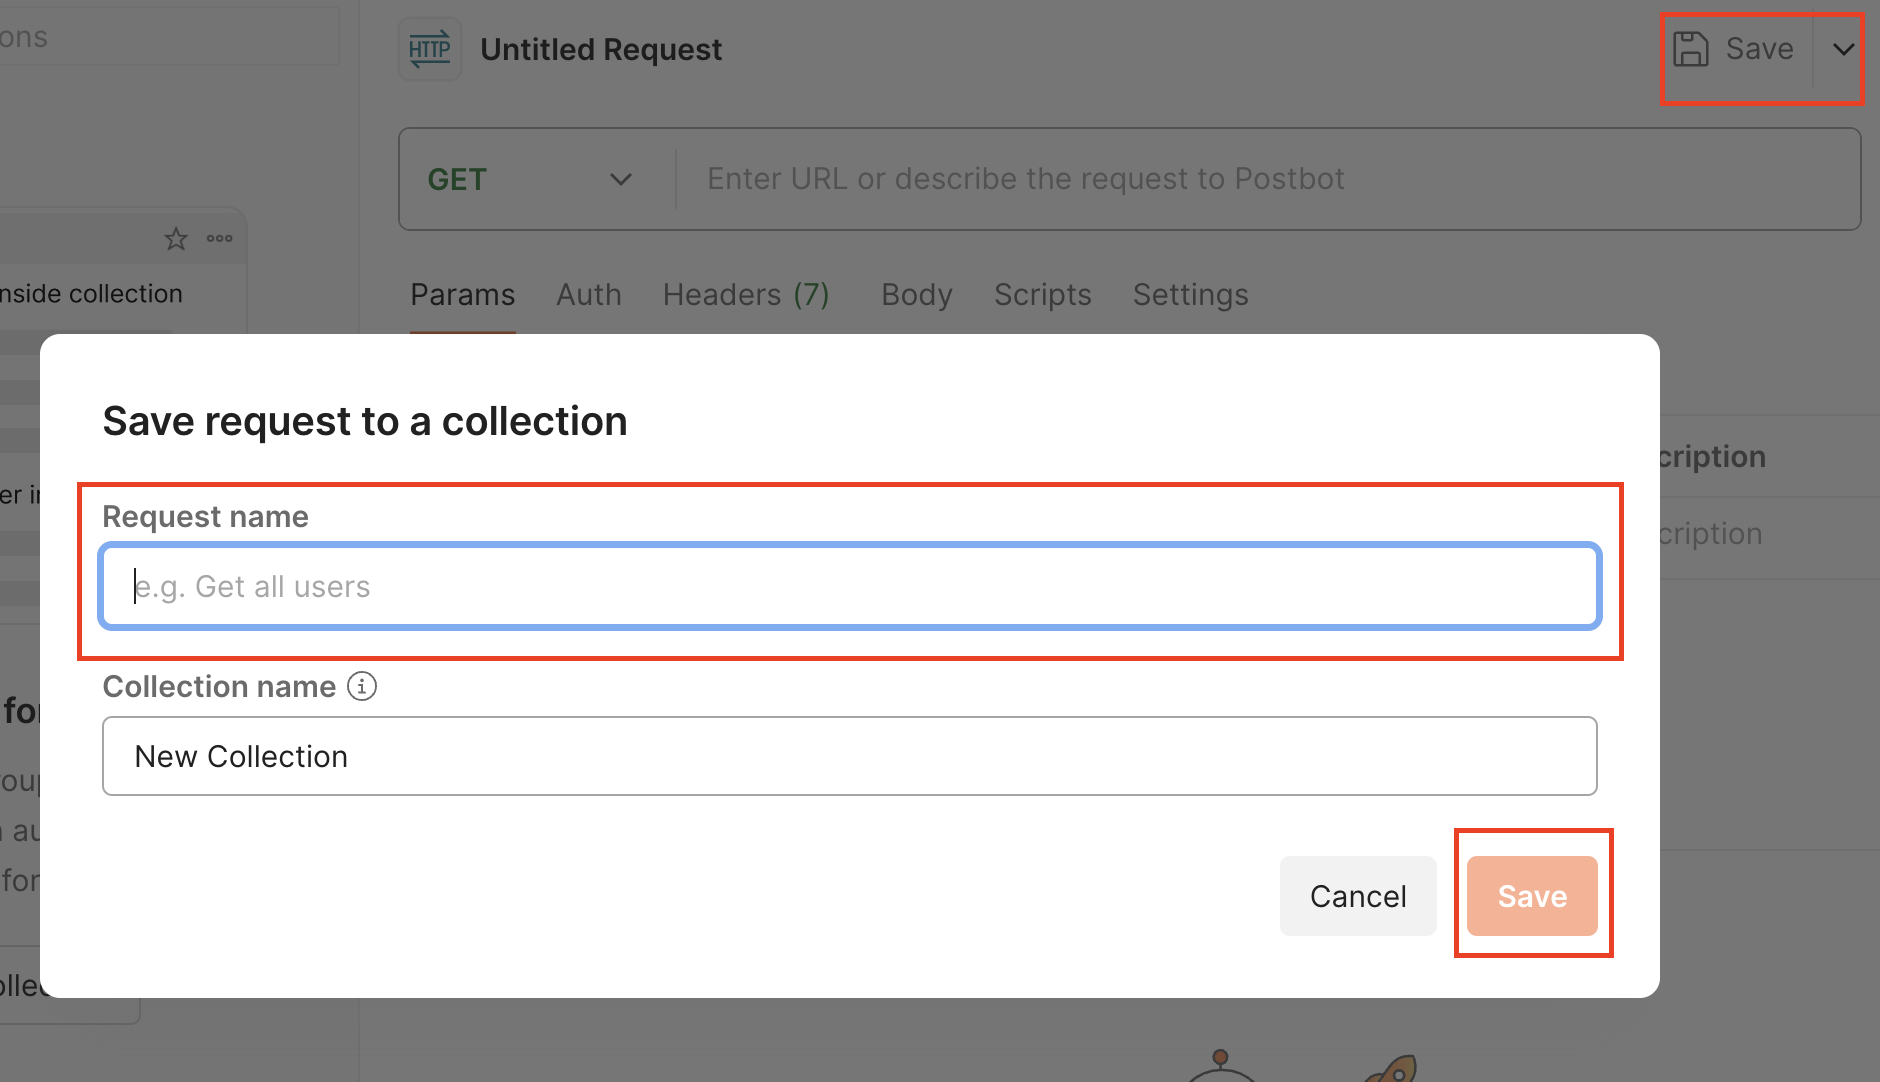
- Open Postman, for this guide we are using Postman version 11.60.4.
- Select your workspace.
- Click New → Select HTTP.

- Click Save → Enter your request name and save.
For more information on Postman setup, see Get started in Postman.
Postman Configuration with Token-Based Authentication (TBA)
- Open the integration record and make sure that Token-Based authentication is checked.
- Form the Administrator home dashboard, go to Setup tab
- Navigate to Integrations → Click “Manage Integration”
- Open the Integration record.
- Go to the Authentication tab, ensure that the Token-Based authentication is checked.

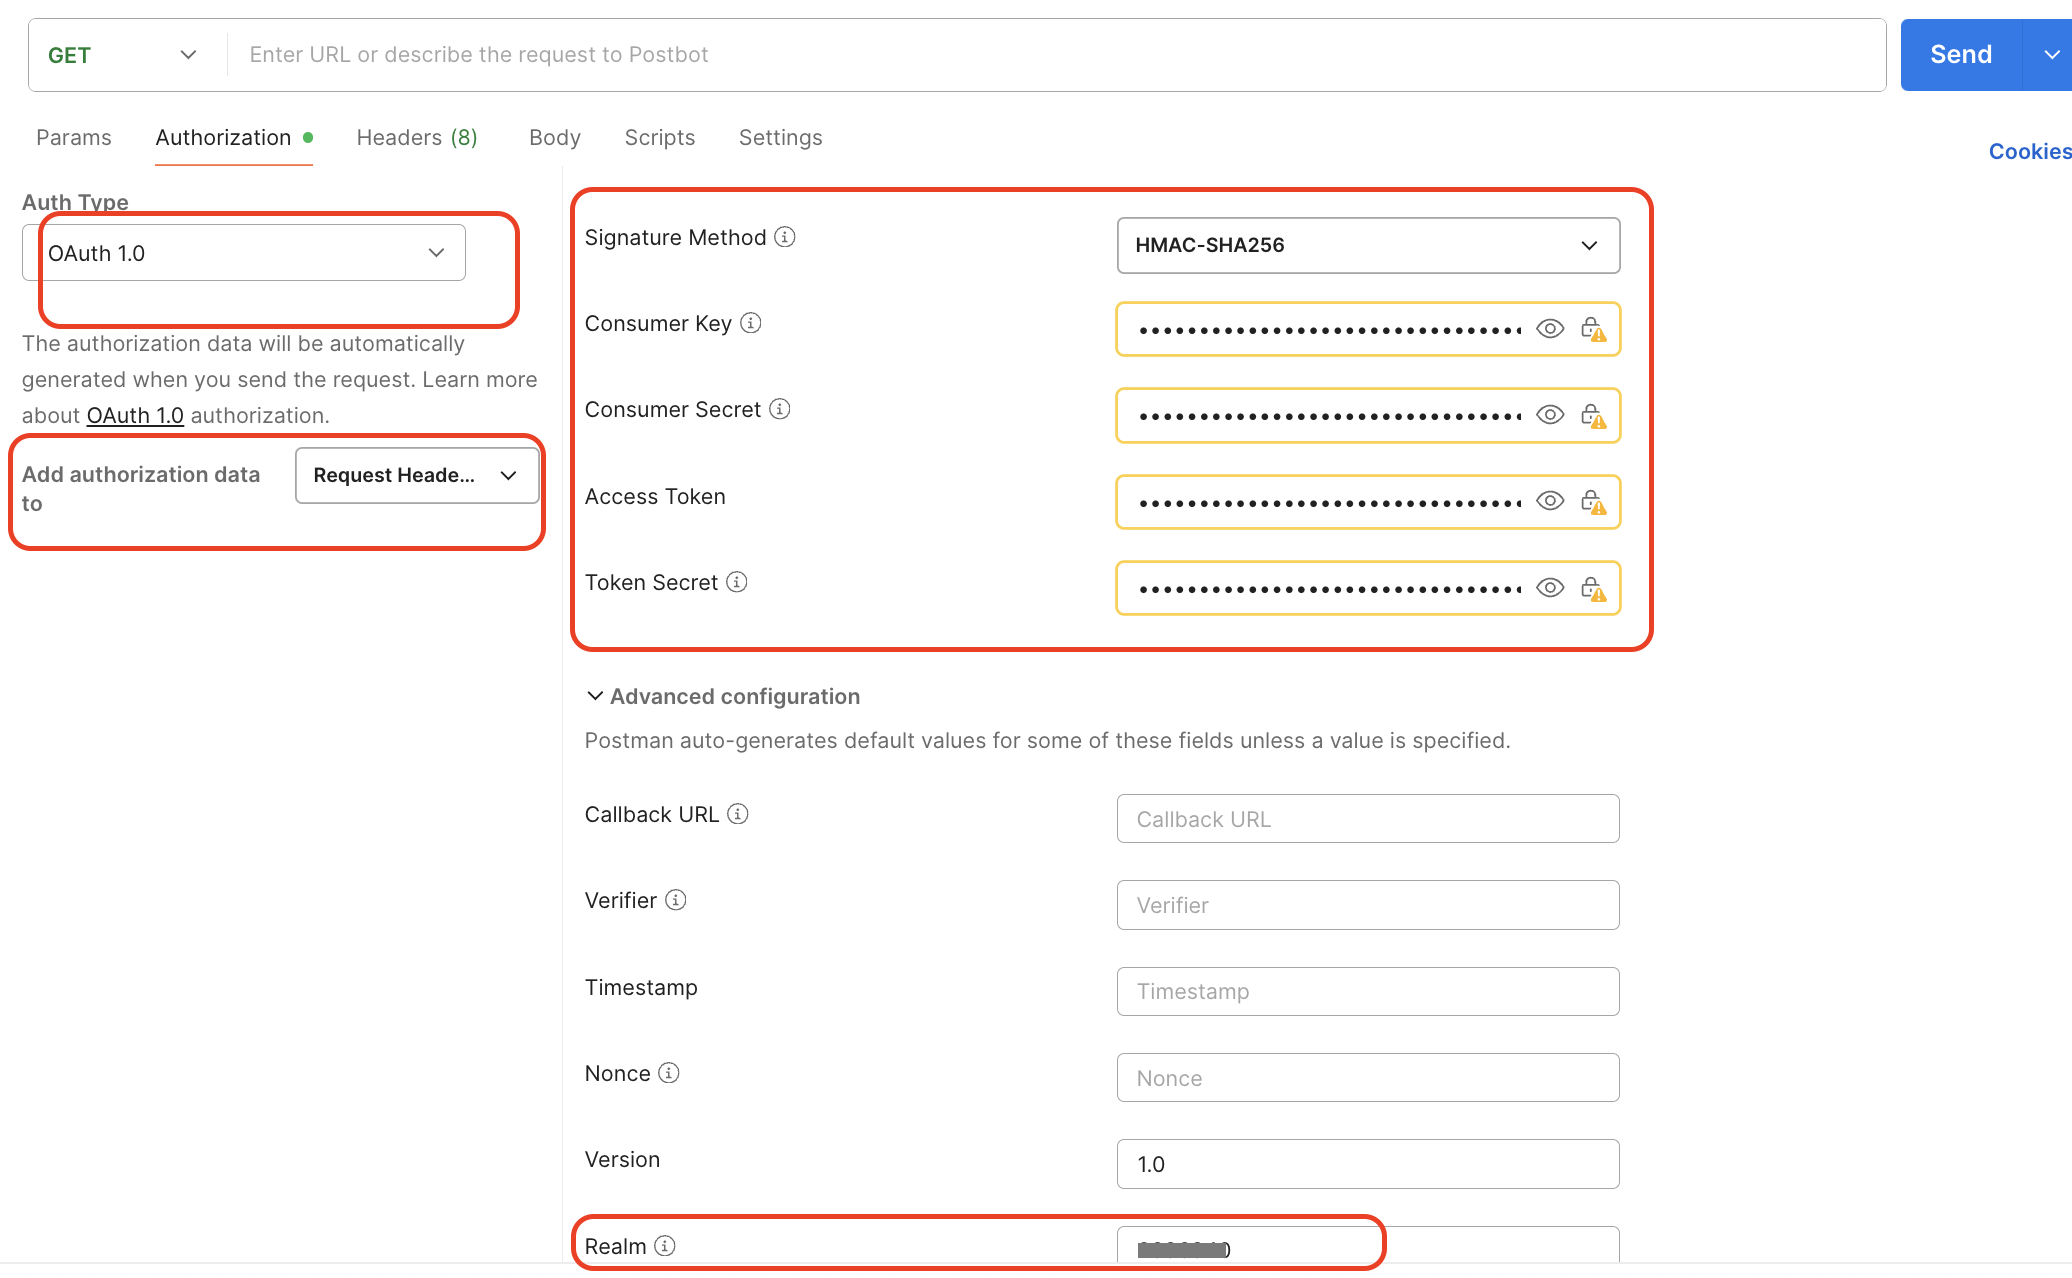
- Go back to Postman → Go to the Auth tab.
- Fill in the fields as follows:
- Auth type = OAuth 1.0
- Add authorization data to = Request Headers
- Signature Method= HMAC-SHA256
- Enter the credentials:
- Consumer Key
- Consumer Secret
- Access token = Token ID
- Token Secret
- Realm = Account ID
- If you are testing in a Sandbox account, always use uppercase letter and underscore(_) for separation. E.g: _SB = 123456_SB1.
- Perform a request. See the section below.
Postman Configuration with OAuth 2.0 Authentication
- Ensure that the following fields in the Integration record are checked and populated with the required field.
- From the Administrator home dashboard, go to “Setup” tab.
- Navigate to Integrations → Click “Manage Integration”
- Open the Integration record.
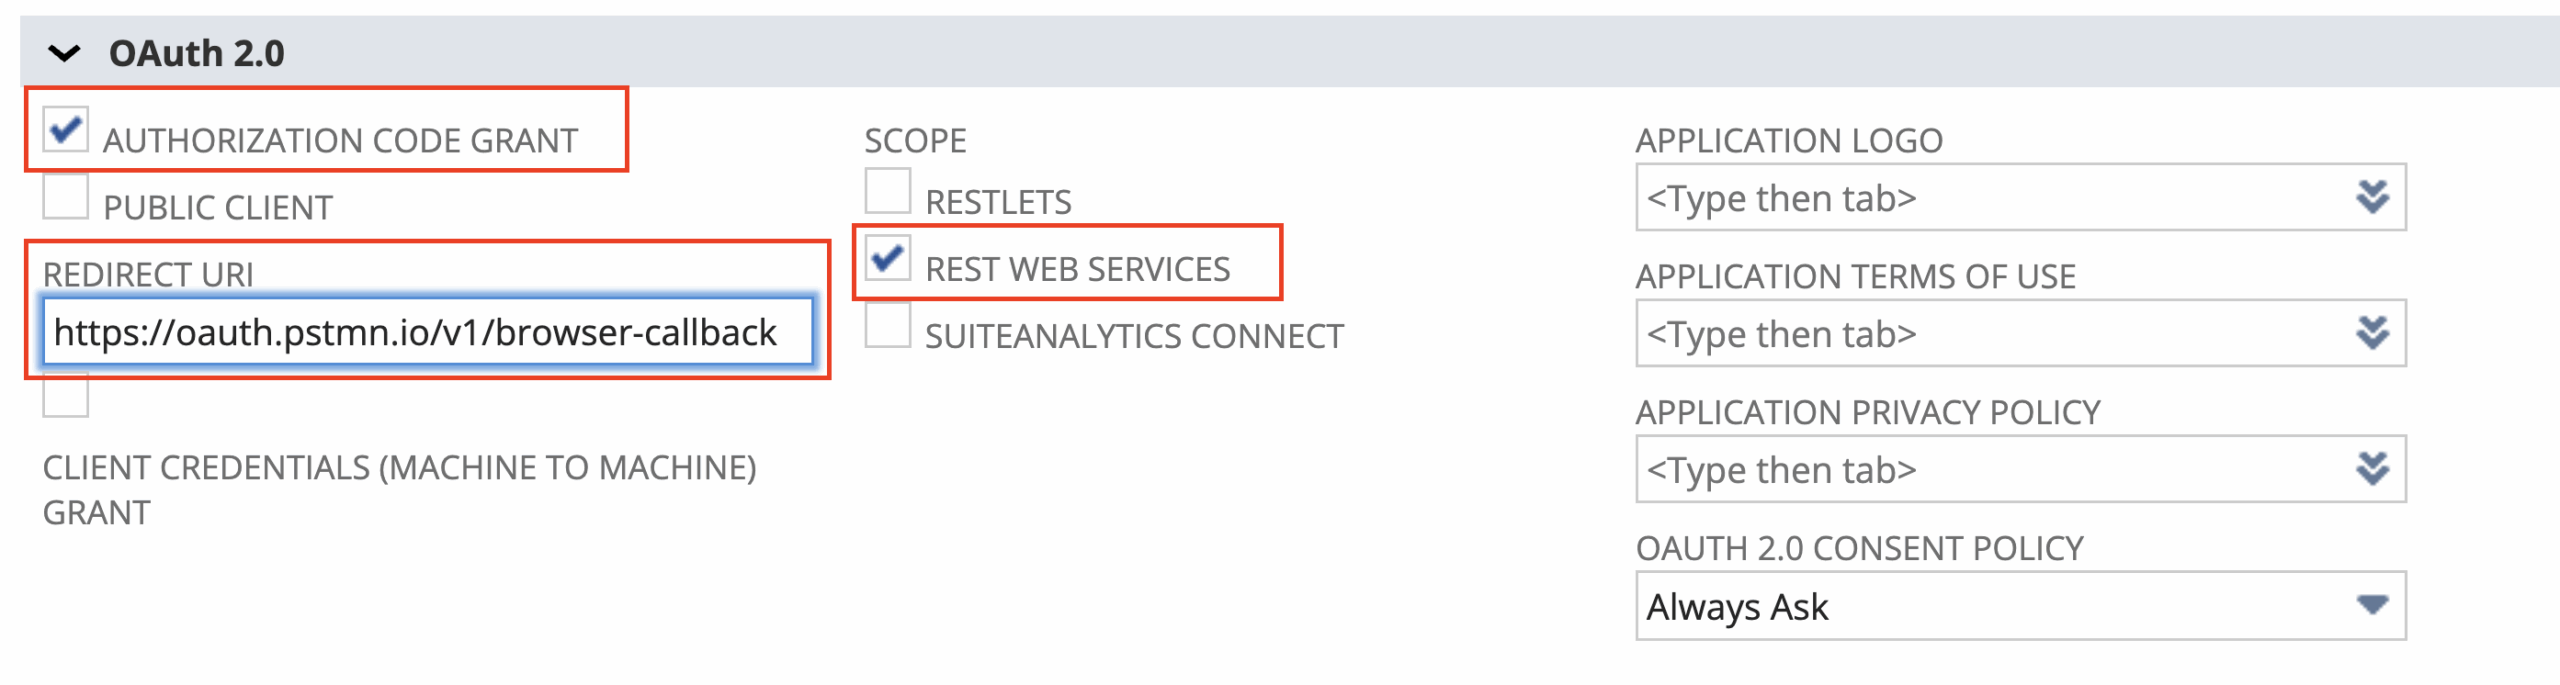
- Go to the Authentication tab, make sure that the following fields are checked or filled in correctly.
- Authentication Code Grant
- Rest Web Services
- Redirect URI = https://oauth.pstmn.io/v1/browser-callback , see Postman’s callback URL for more information.
- Go back to Postman → Go to the Auth tab.
- Fill in the fields as follows:
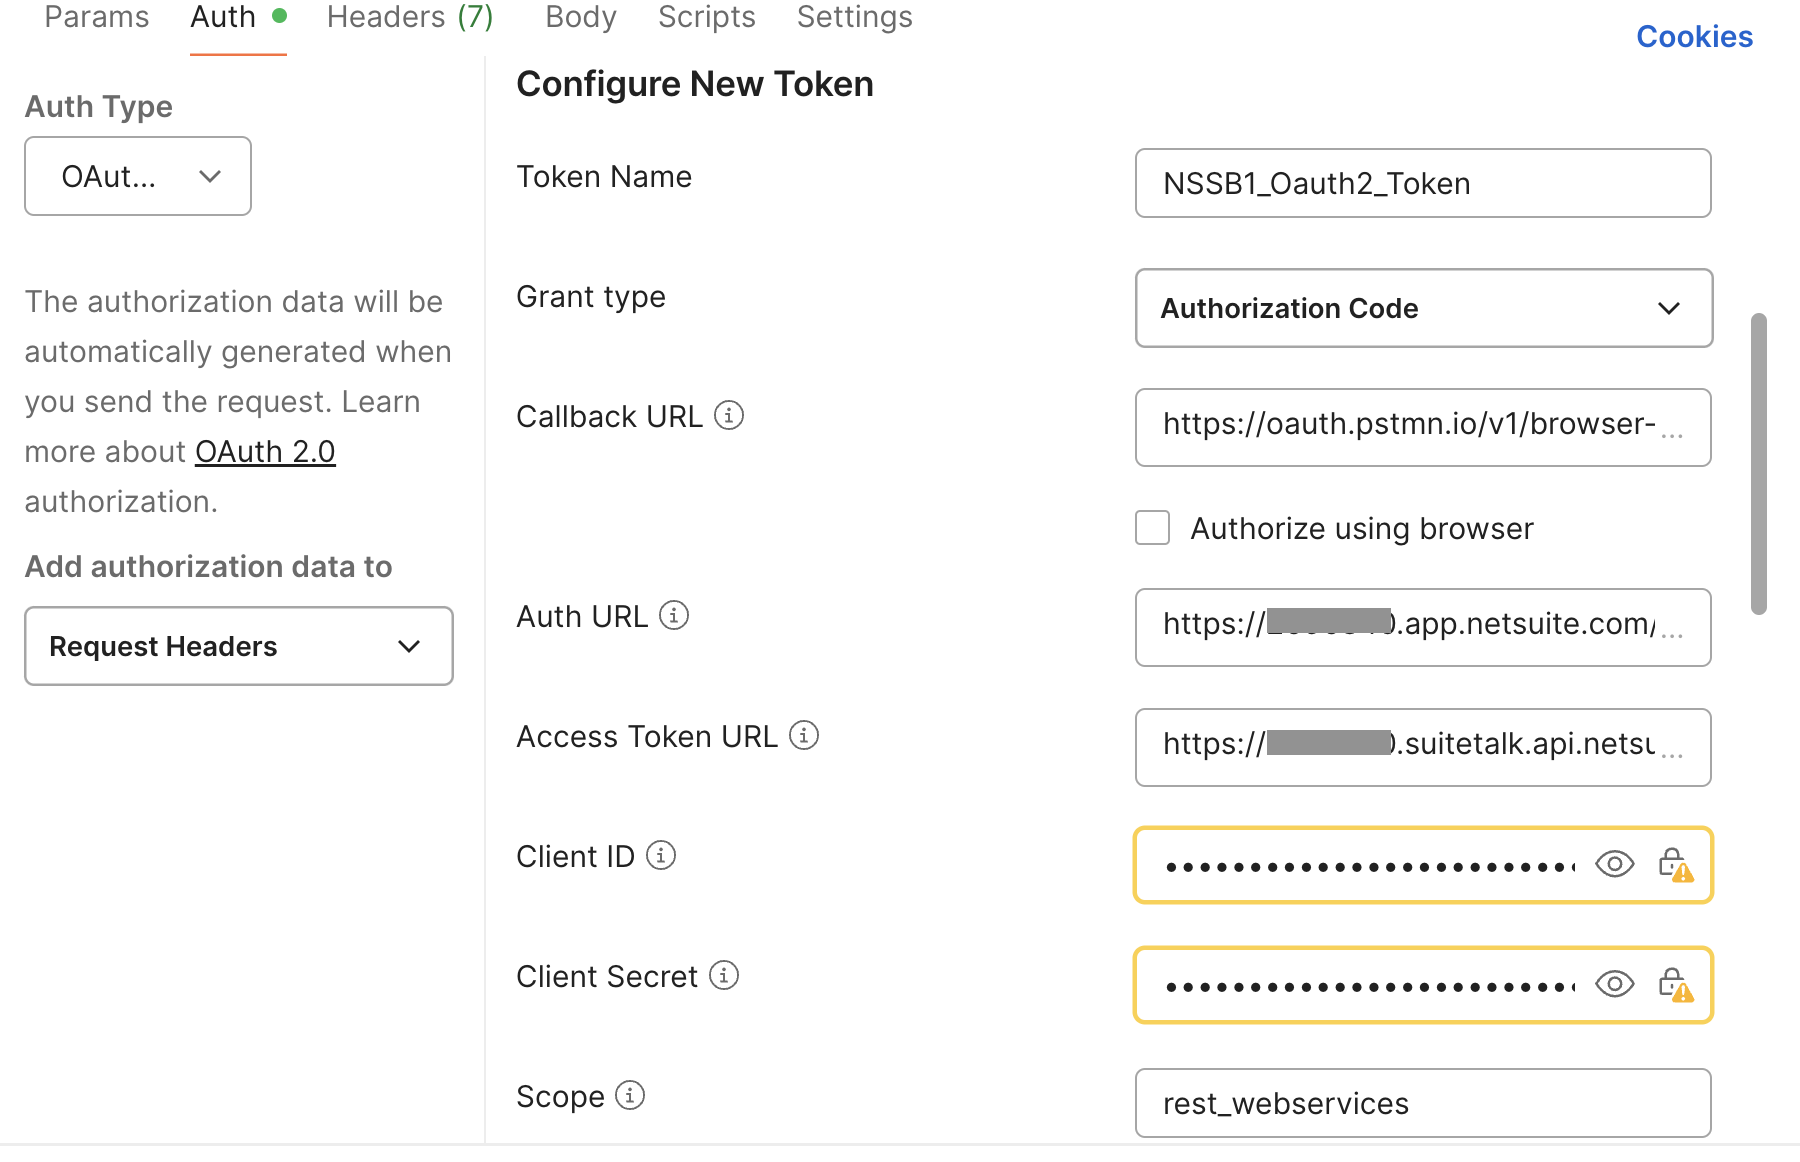
- Auth type = OAuth 2.0
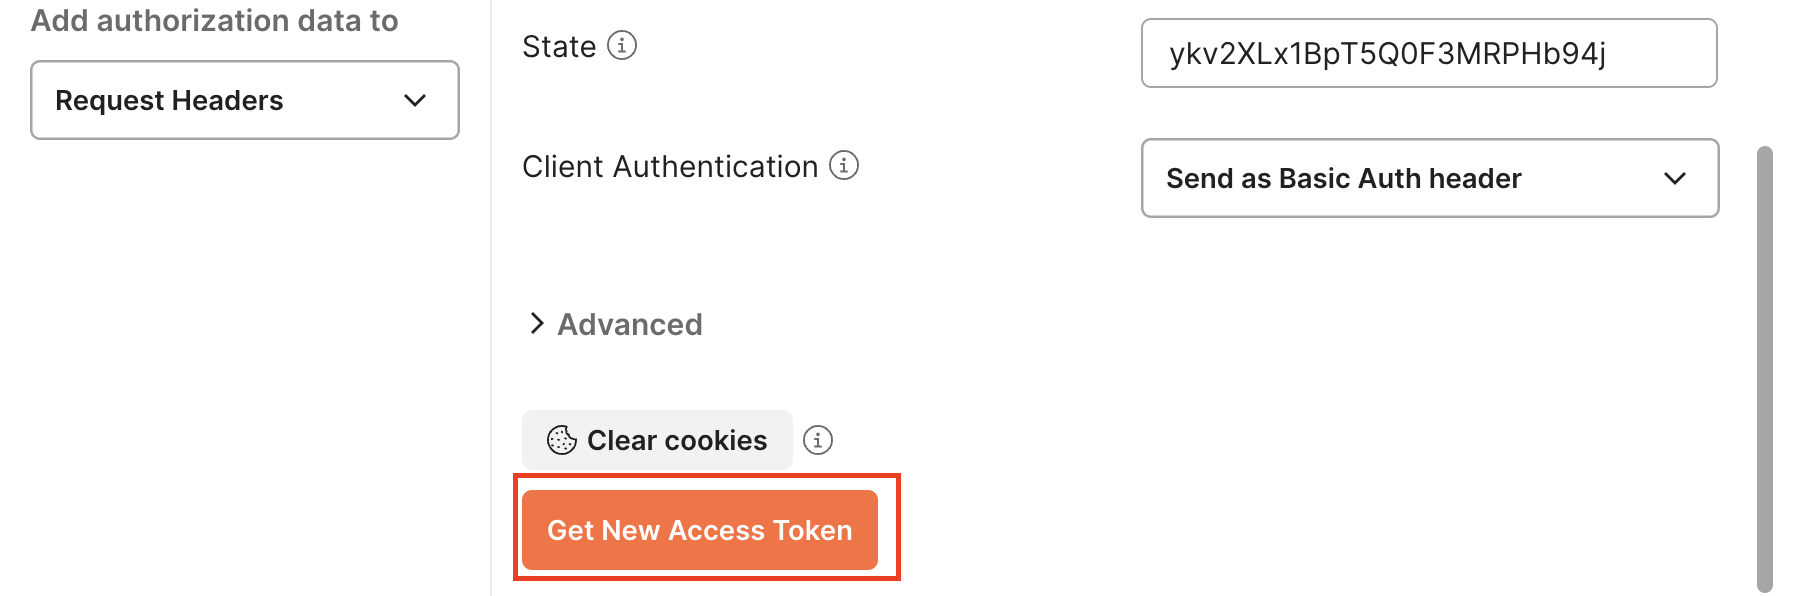
- Add authorization data to = Request Headers
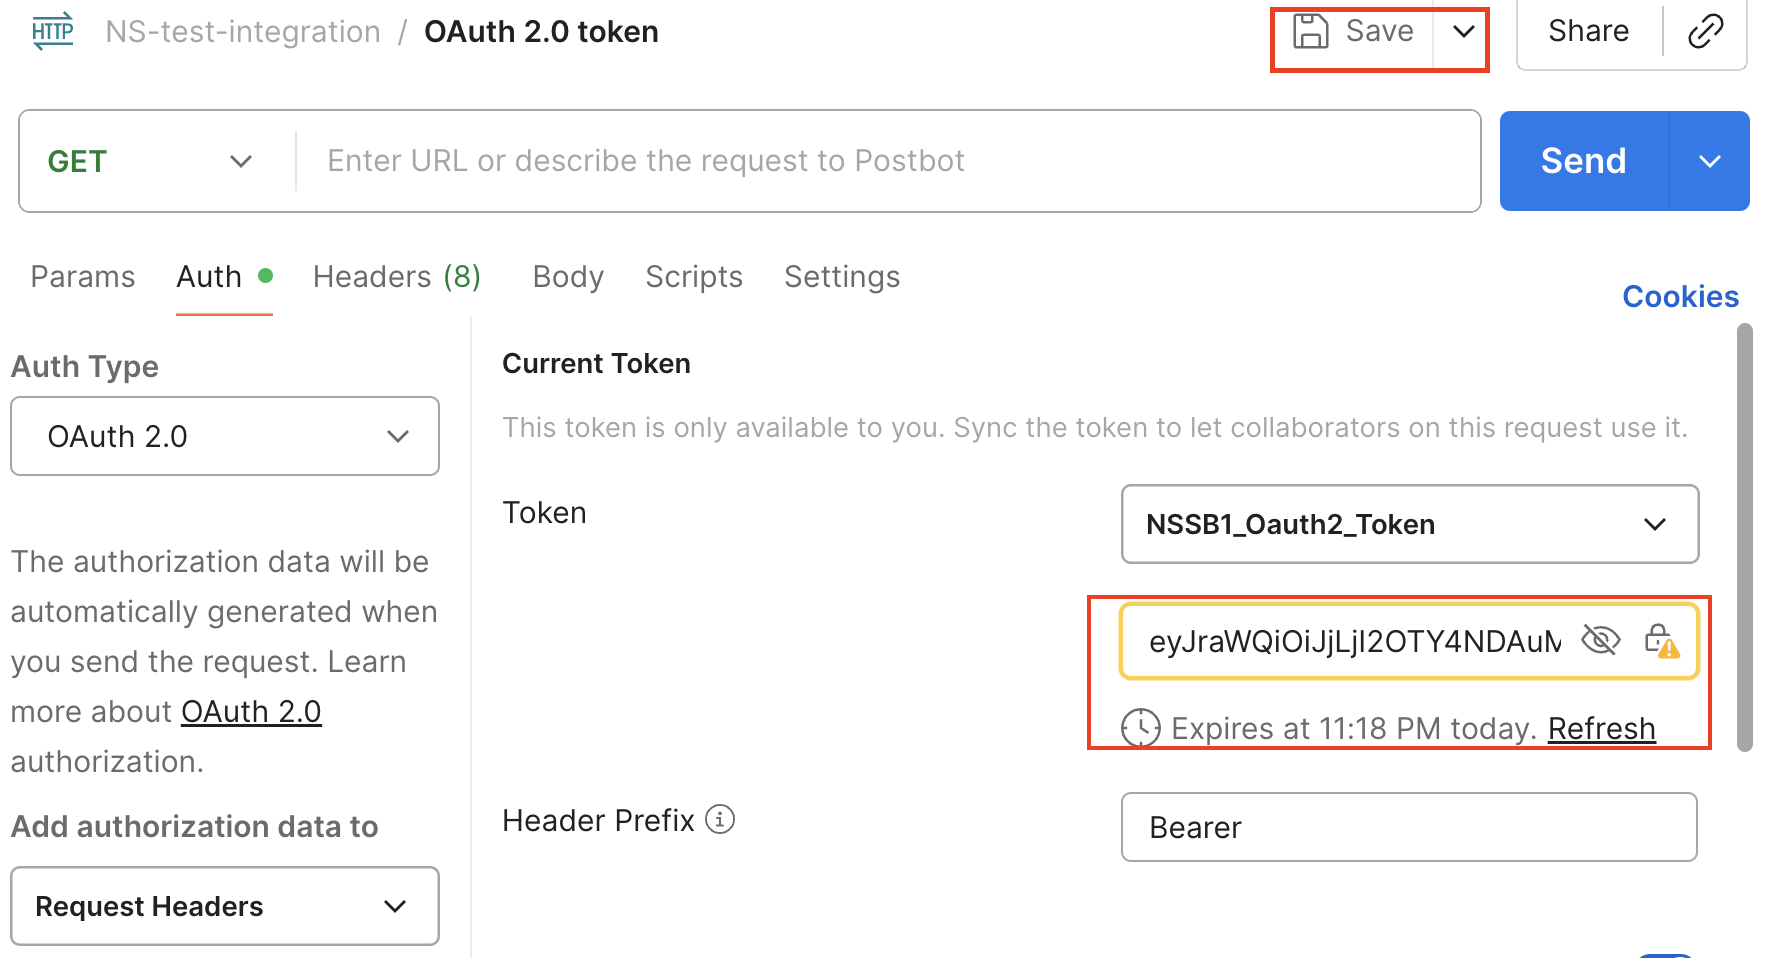
- Under Configure New Token
- Token Name = NSSB1_Oauth2_Token, you may use your preferred token name.
- Grant type = Authorization Code
- Callback URL = https://oauth.pstmn.io/v1/browser-callback, must match the Redirect URI in your Integration record.
- Auth Url = https://.app.netsuite.com/app/login/oauth2/authorize.nl, change to your account ID.
- Access Token Url = https://.suitetalk.api.netsuite.com/services/rest/auth/oauth2/v1/token, change to your account ID.
- Client ID = from Integration record Client Key.
- Client Secret
- Scope = rest_webservices
- State = ykv2XLx1BpT5Q0F3MRPHb94j, must be between 22 and 1024 ASCII characters.
- Client Authentication = Send as Basic Auth header
- Generate an Access Token.
- Click Get New Access Token.
- A browser window will open for authentication.
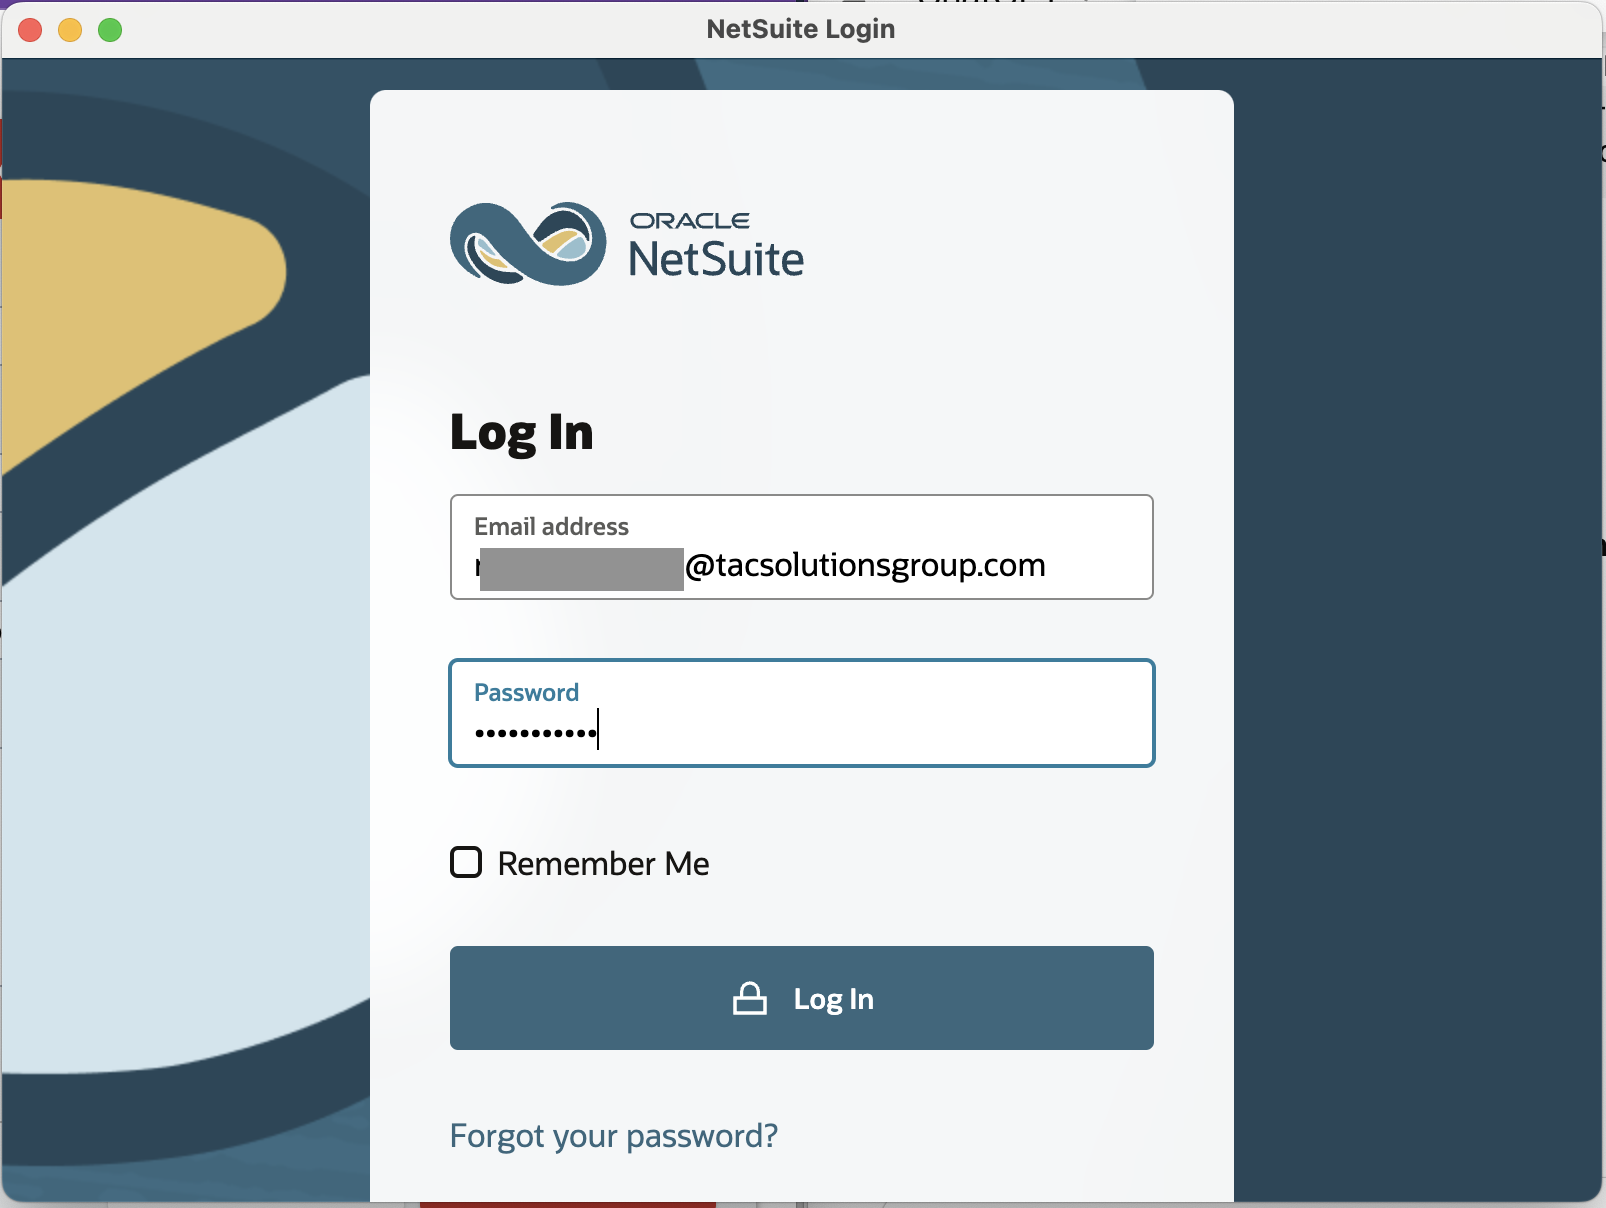
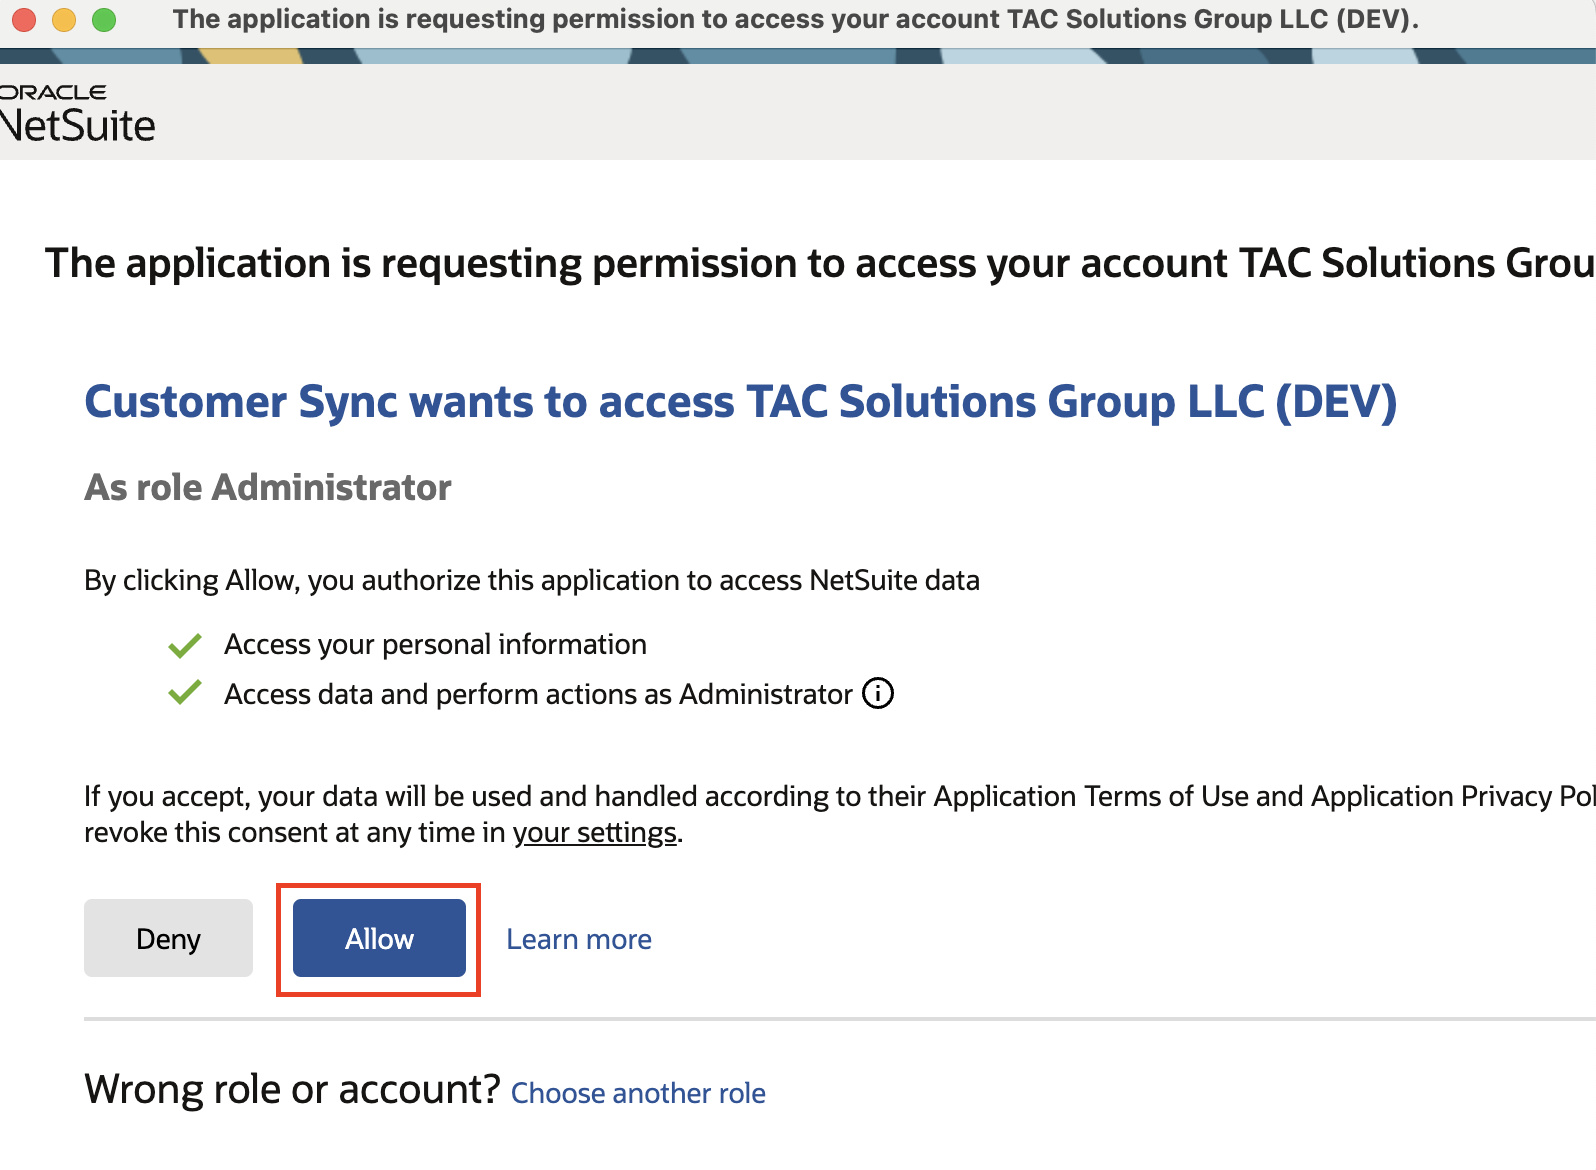
- After login, click Allow.
- After giving permission, Postman retrieves the access token. Click “Use Token”.
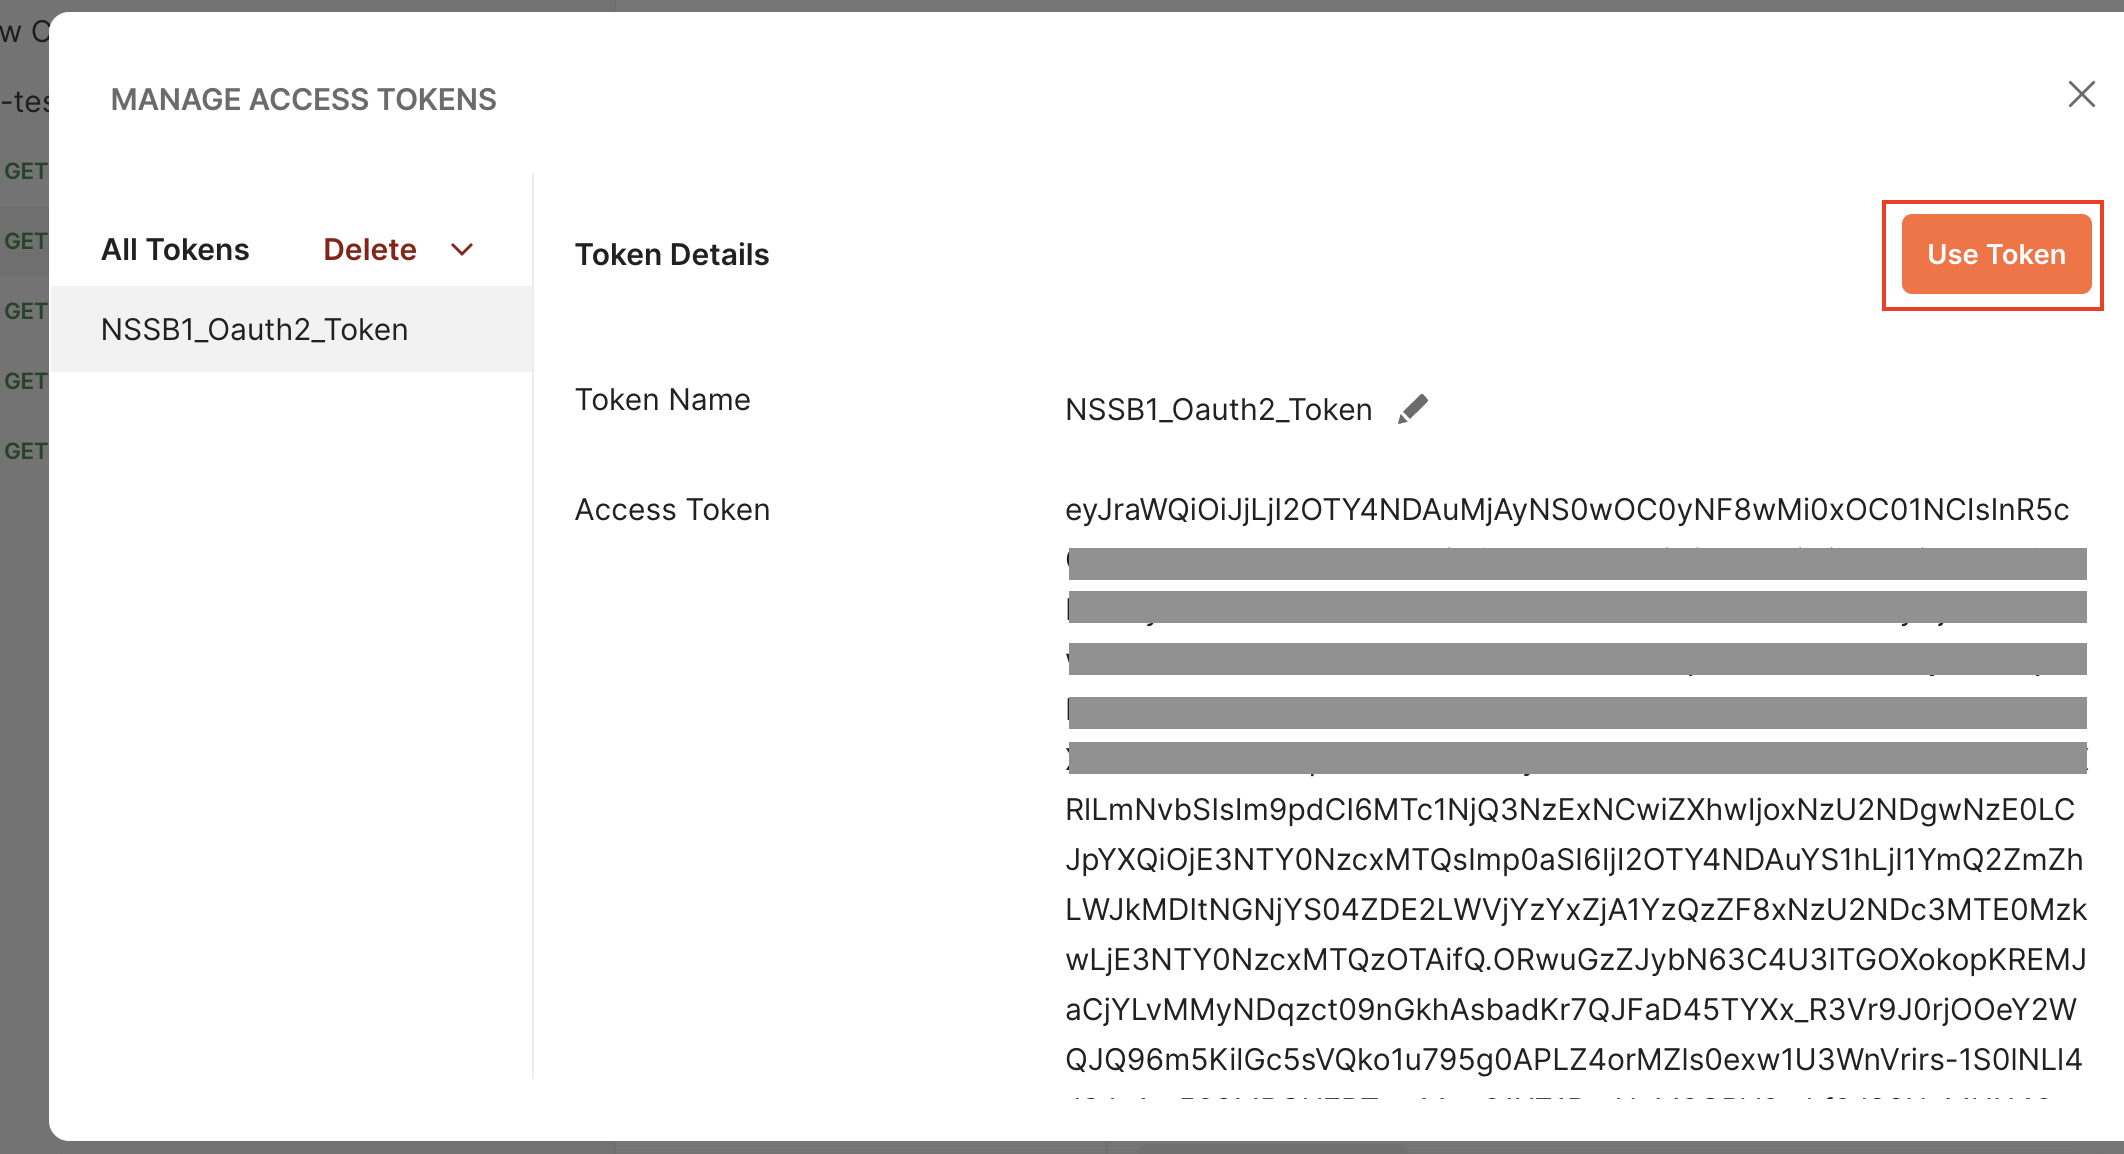
- The token will show up under Current Token. Click “Save”.
- Perform a request. See the section below.
Perform a Request
- In your request, select “Get” method.
- Enter a Suitetalk API endpoint, E.g.: https://.suitetalk.api.netsuite.com/services/rest/record/v1/customer, change ” <ACCOUNT_ID> ” to your account ID. See REST Web Services URL Schema and Account-Specific URLs for more information.
- Click “Send”

- You’ll get a response code `200` for a successful request and a JSON response body.

- Generate an Access Token.
- Click Get New Access Token.
Conclusion
Testing a Netsuite Integration record with Postman ensures your established integration is working properly before connecting it to a third-party application. Token-Based Authentication (TBA) relies on tokens generated directly in Netsuite’s Access token record, while OAuth 2.0 requires requesting a token from an authorization endpoint before making API calls. Understanding these differences helps you choose the right method for your integration and manage authentication more effectively.
How TAC Can Help
At TAC, our experienced NetSuite consultants help businesses seamlessly establish and validate secure integrations with external applications. We handle the setup of Token-Based Authentication (TBA) and OAuth 2.0, manage credentials, and resolve connectivity or authentication issues with precision. Our team also optimizes sandbox environments, verifies permissions, and ensures all required NetSuite features are properly configured. With TAC as your integration partner, you can streamline processes, minimize errors, and achieve reliable, real-time communication between NetSuite and your connected systems.


