

As businesses expand their digital ecosystems, connecting systems with external applications becomes essential. NetSuite provides tools that enable external systems to connect and exchange data securely, with the Integration record at the core of this process. In this article, we’ll provide a step-by-step guide and share best practices for creating an Integration record in NetSuite, which serves as a key component of SuiteTalk.
NetSuite Integration record is used to manage and monitor web services activities within your NetSuite account. For example, an external system requests to get a customer record. In the image below, it shows the user interface of the Integration record along with the web services activity logs.

Pre-requisites
- Administrator access
- Ensure you are logged in with an Administrator access
- Enabled features
- Go to Setup → Company → Enabled Features
- Go to SuiteCloud tab
- Confirm that the following features are checked.
- SOAP Web Services
- REST Web Services,
- Token-Based Authentication (if needed)
- OAuth 2.0 (if needed)
- Other best practices
- Clear integration requirements
- You need to determine which external application will connect to NetSuite. This will help with integration record naming and other necessary configuration.
- Determine the access level needed. E.g. read-only or full access
- List down the necessary features and specify the records needed to access. This is a guide to create a dedicated integration role.
- Dedicated integration role
- Create or assign a role specifically for the integration with only necessary permission.
- This minimizes security risk by applying the principle of least privilege.
- Security storage for Keys
- Store sensitive credentials in a secure password manager or vault.
- Clear integration requirements
Step-by-Step Guide
Generate consumer key and consumer secret
1. Form the Administrator home dashboard, go to Setup tab
2. Navigate to Integrations → Manage Integration → Click “New”
3. Enter the integration name and select “Enabled” in the State field

4. Set your authentication method based on your requirements.

a. It’s recommended to use either Token-based or OAuth 2.0.
b. If you don’t have a callback URL, uncheck TBA: Authorization Flow.
c. For OAuth 2.0, it’s required to enter a Redirect URI.
5. Click save.
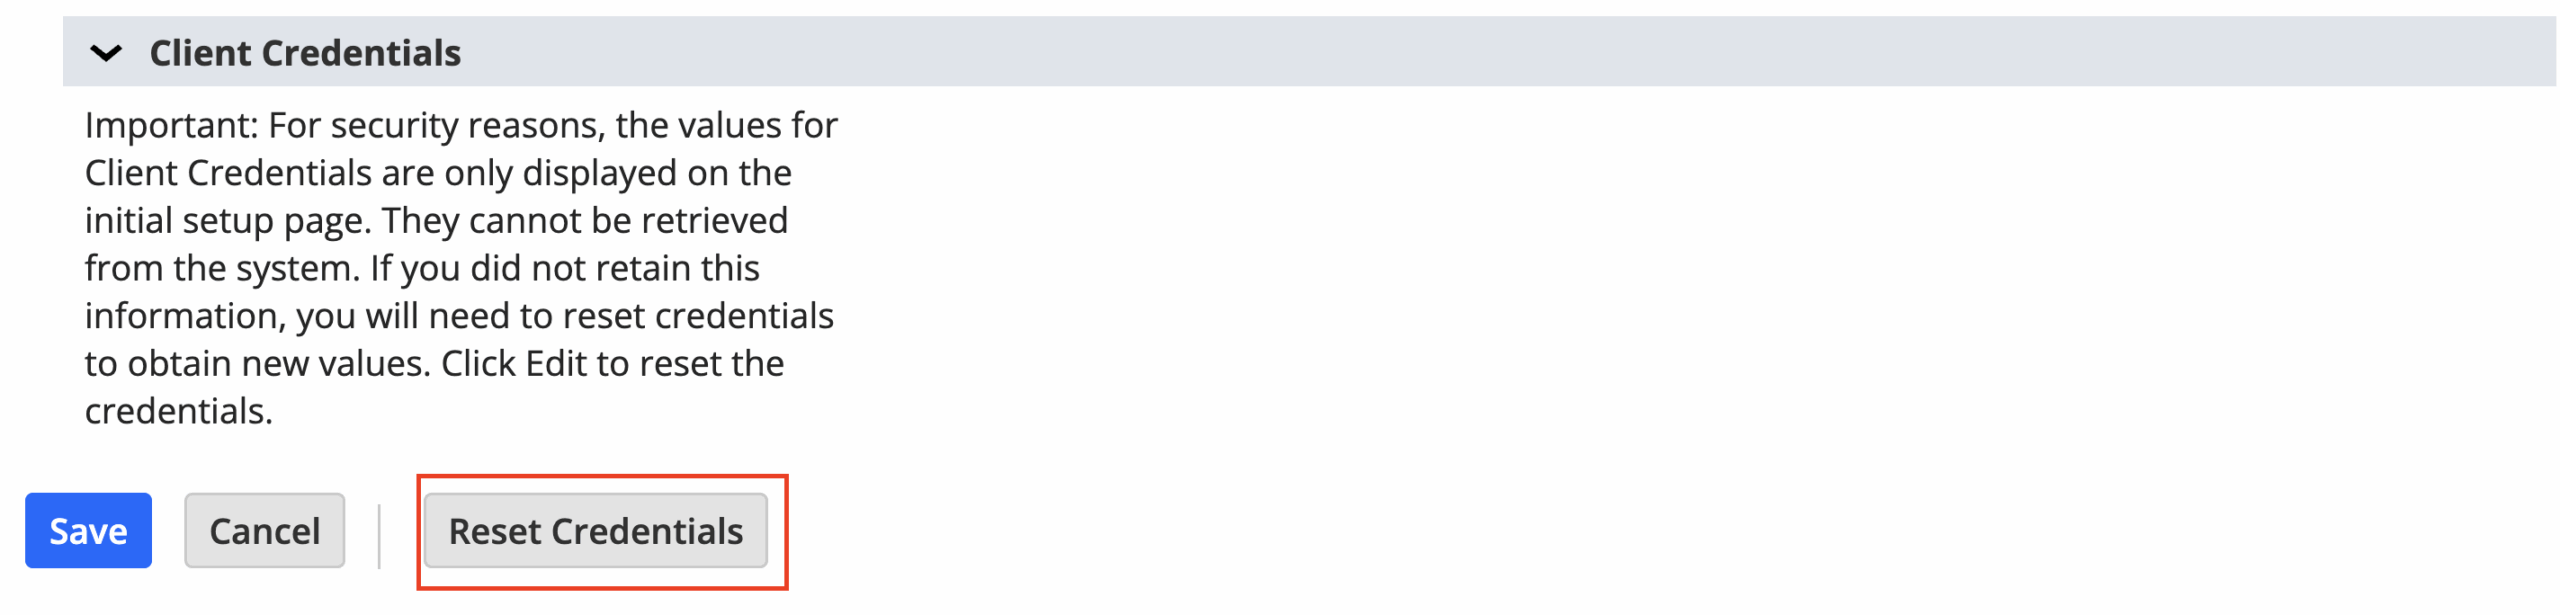
6. After saving the record, it will display the generated consumer key and secret at the bottom section. Please note that the key and secret are shown only once upon generation. Be sure to copy and paste them into a text file or a secure storage location.

a. If you lose the consumer key and secret, you can edit the integration record then click Reset Credentials.
Create a custom role for integration and role assignment
1. Go to Setup tab → Users/Roles → Manage Roles → Click “New”
2. Enter the integration role name
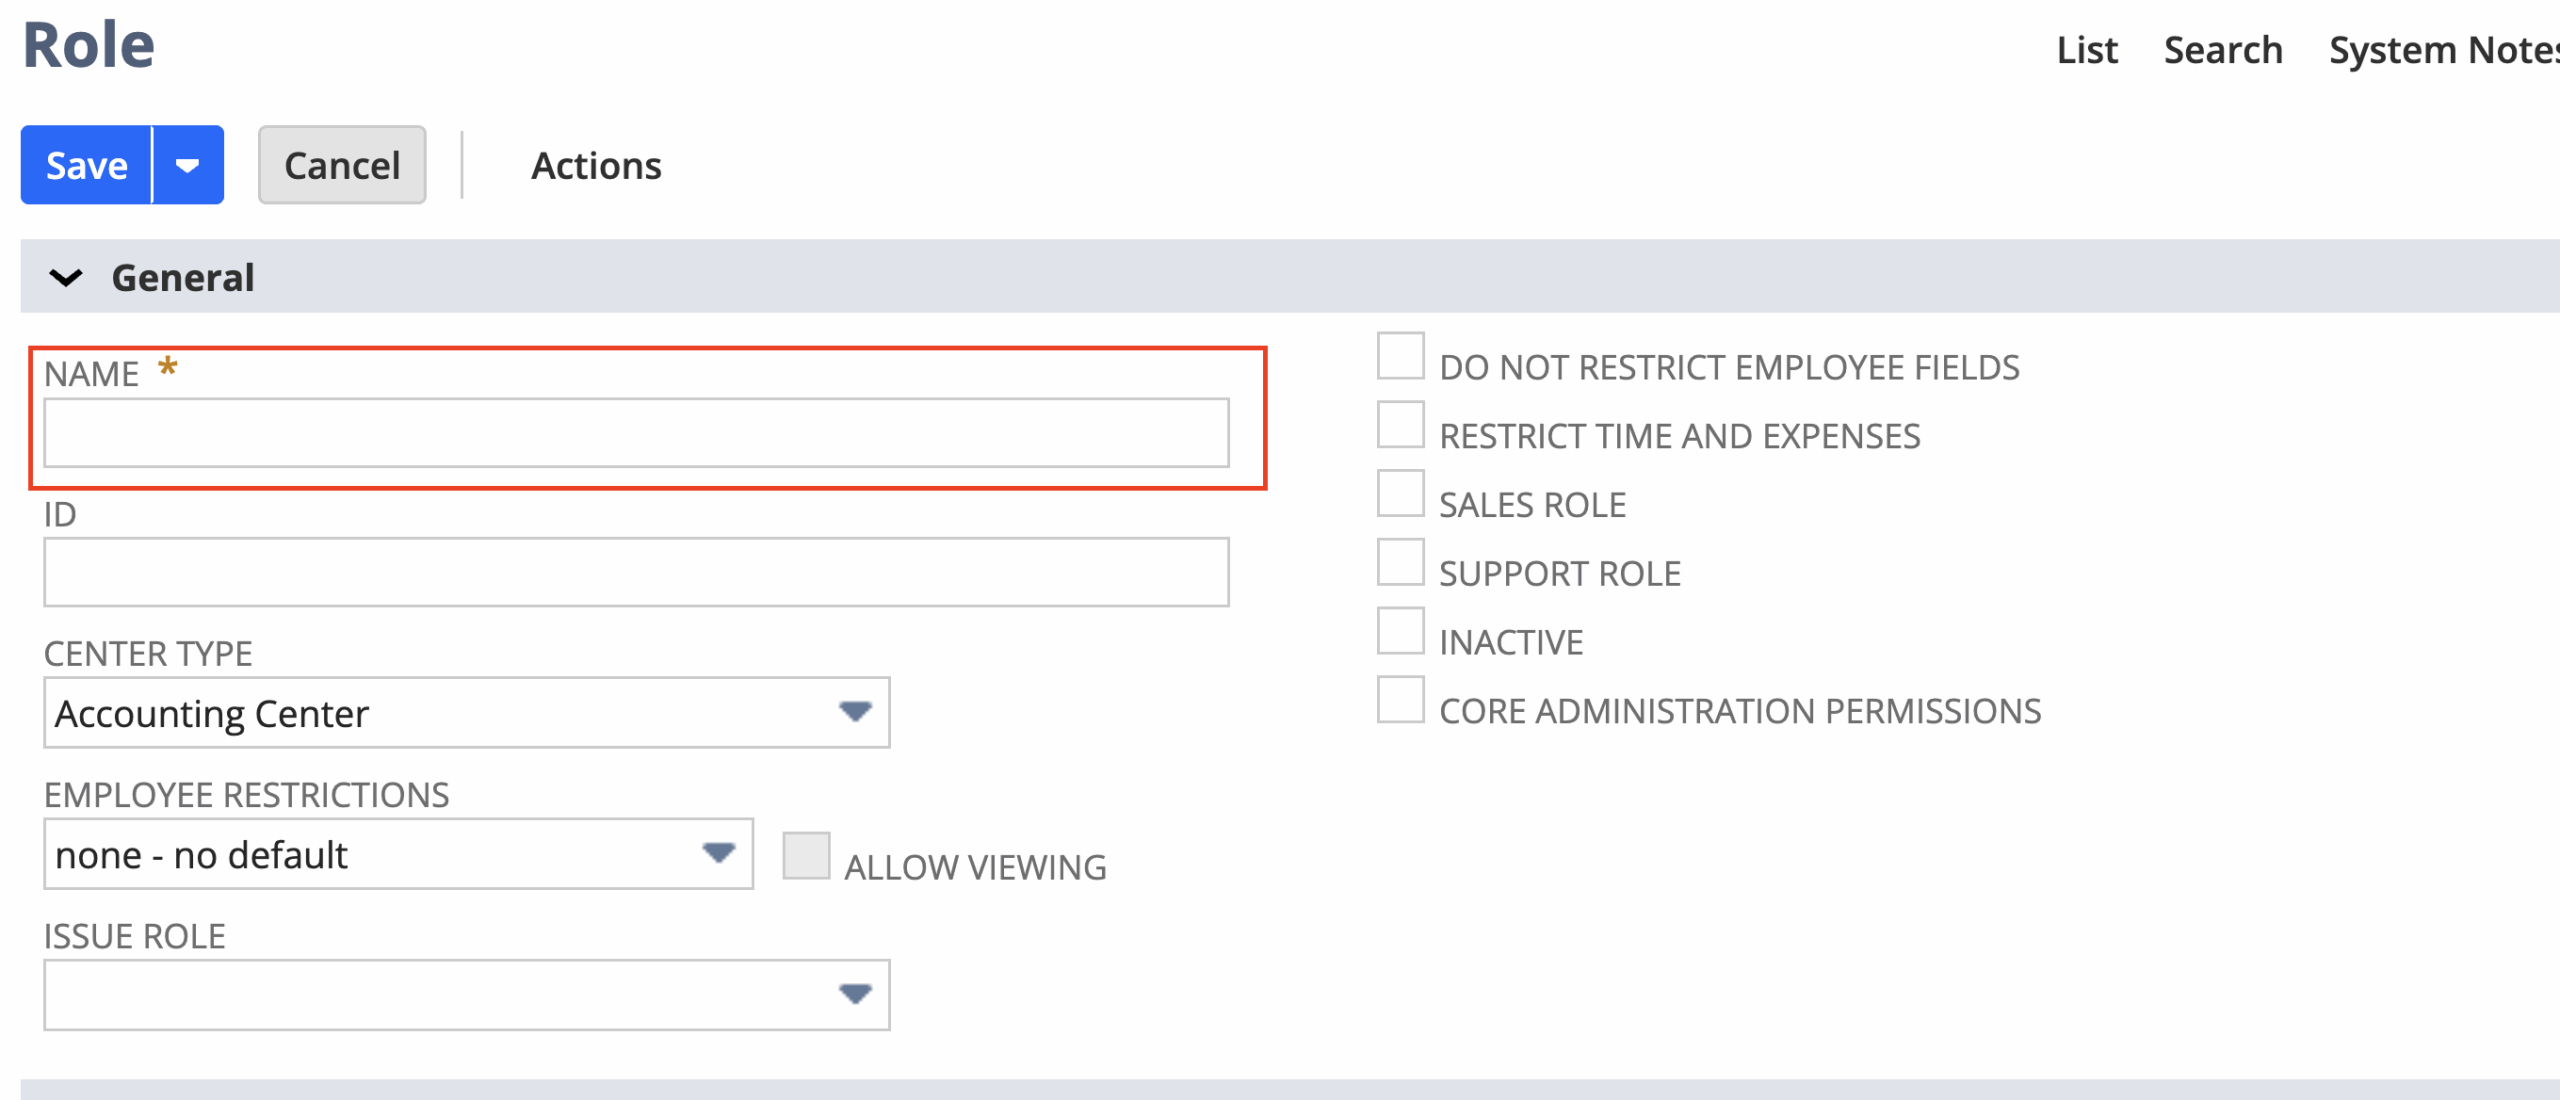
3. Set up the role according to the requirements, permission list and permission levels as part of the prerequisite procedure.
4. Ensure that at a minimum, the following permissions are added with Full level access in the Permissions tab → Setup tab.
a. Enable Features
b. Log in using OAuth 2.0 Access Tokens
c. SuiteScript
d. SuiteSignOn
e. User Access Tokens
f. Web Services
g. SOAP Web Services
h. REST Web Services
5. Click Save.
6. Assign the integration role to an employee.
a. Search and edit the desired Employee record.
b. Navigate to the Access tab and ensure that the Give Access is checked.
c. Go to the Roles sub-tab
d. Add the required integration role.

Generate token ID and token secret
This procedure is required for token-based authentication method only.
1. From the Administrator home dashboard, go to the Setup tab.
2. Navigate to → Users/Roles → Access Tokens → Click “New”

3. Select the integration name in the Application Name field.
4. Select the employee user.
a. If the employee does not have the required permissions or integration role access, they will not be included in the list of options.
5. Select the appropriate integration role.
6. Click Save.
7. After saving the record, it will display the generated token id and secret at the bottom section. Please note that the id and secret are shown only once upon generation. Be sure to copy and paste them into a text file or a secure storage location.

a. If you lose the id and secret, edit the access token record
b. Click Revoke to remove the existing access.

c. Create a new access token.


