Improve NetSuite Vendor Management Efficiency With A Vendor Activity Check

Get Rid of All the Clutter in 12 Steps
Book Clutter

Vendor management is a critical aspect of any business operation, and efficient processes can significantly impact the overall productivity and financial health of an organization. In this blog post, show how to identify non active NetSuite vendors and remove them from your active vendor list. The advantages of using NetSuite’s vendor activity checks, will help to prevent paying closed contract purchase orders (POs), make it easier to find vendors, and decrease page load times. Let’s dive in!

Inactivating Non-Active Vendor Records Can:

decrease Page Load Times

Make it Easier to find vendors

Prevent Paying closed contract POs

Step 1: Create a New Saved Search

From the top Navigation Global Search Enter: “new saved search”

NetSuite - New Saved Search

Step 2: Select Vendor

Scroll down and select “Vendor” from the list of search types

Select the Vendor Record

Step 3: Enter a name and Criteria

Enter a name for the saved search “Vendor Activity Check” and the following critera

Inactive > No

Transaction Fields… > Type > Bill Payment

Criteria 1

Step 4: Click Results and copy the result values

Enter the following fields into the result tab

Name (Set Summary Type to Group)  

Internal ID

Transaction Fields… > Date (Set Summary type to Maximum)

Transaction Fields… > Date (Set Summary Type to Count)

Transaction Fields… > Document Number  

Transaction Fields… > Internal ID

Results 2

Step 5: Click Save & Run

Click “Save and Run” by hovering over the save button.

Click Save and Run

Step 6: Export the Data

Export the Data to excel by clicking the button highlighted in the image below

resultset 3

Step 7: Edit the CSV in Excel

Using a combination of the Last Transaction Date and the total Count of Transactions you can determine which Vendors should be inactivated. The results go from least active vendors on the top to most active below. REMOVE ALL Vendors from the CSV you wish to keep active. All remaining Vendors on the CSV will be inactivated in the next few steps.

Note: Remove the last line on the CSV as this line is the total count

Save the File

Step 8: Import the CSV to NetSuite

In the Navigation Global Search type: “Page: Import CSV Records”

On the first page select the following:

Import Type: Relationships

Record Type: Vendors

Then select the CSV file you saved in the previous step

Click Next

CSVmain

Step 9: Select Update then Click Next

Select Update from the Data Handling List

Under Advanced Options – Make sure “Custom Form” is set to the “Standard Vendor Form”

Then Click Next

Next 1

Step 10: Enter the Field Mapping

Internal ID should be automatically set

Select the second line under Internal ID 

Then Select “Inactive” from the List on the Right

Click on the Pencil Icon on the second line and select Yes

Then Click Next

map

Step 11: Save and Run

Hover over the Save button and Select “Run”

saverun

Step 12: Verify the Import was Successful

Select Import “Job Status Link”

jobstatus

Verify that ALL records were imported successfully

success 2

That's it!

Your non-active vendor records are now inactive and creating much less clutter in your system. 

If you have any questions at all please reach out to info@tacsolutionsgroup.com and we would be happy to help!

Blogs

Share:

More Posts you may like:

Streamline Your Workflow: Establishing Integration Records in NetSuite Made Easy

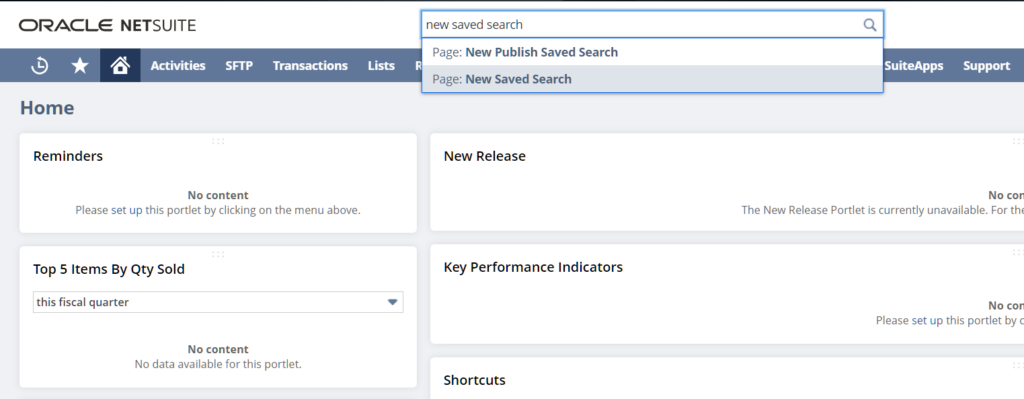
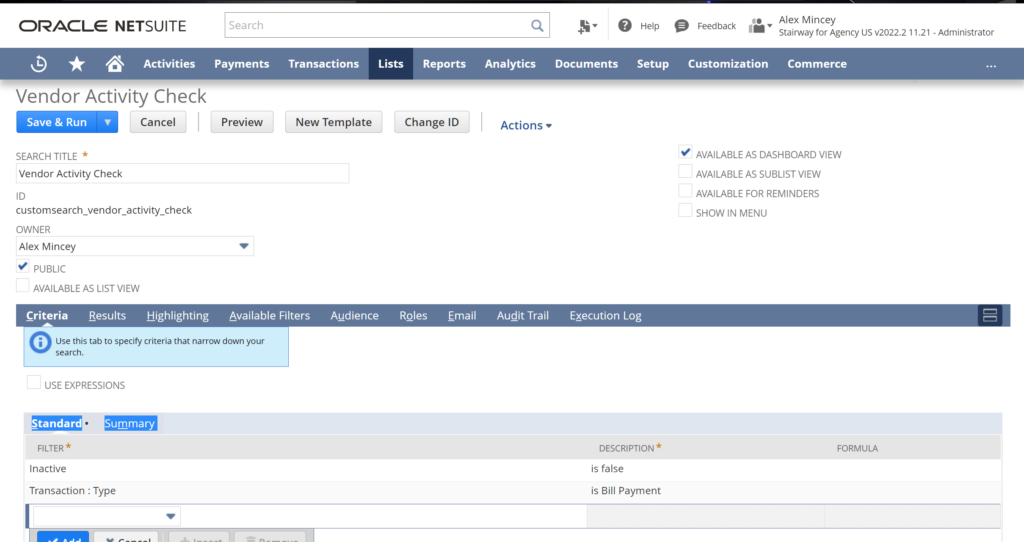
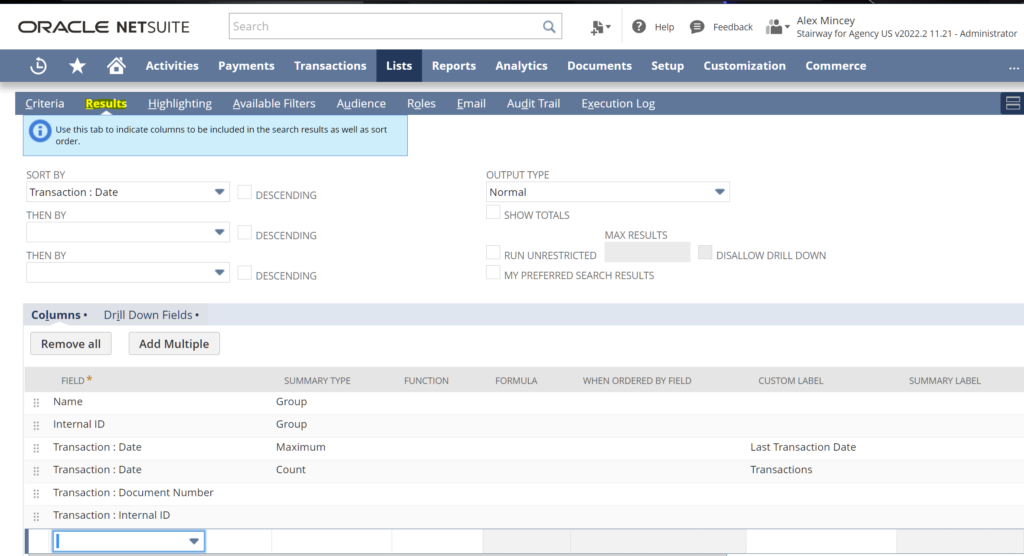
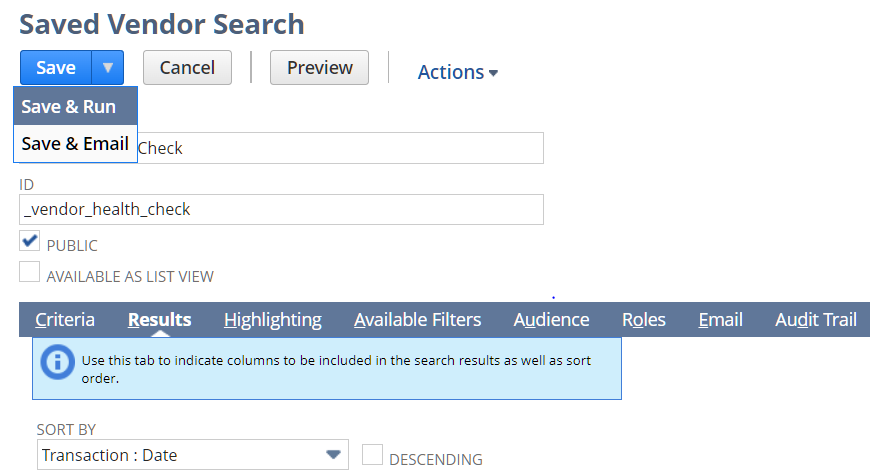
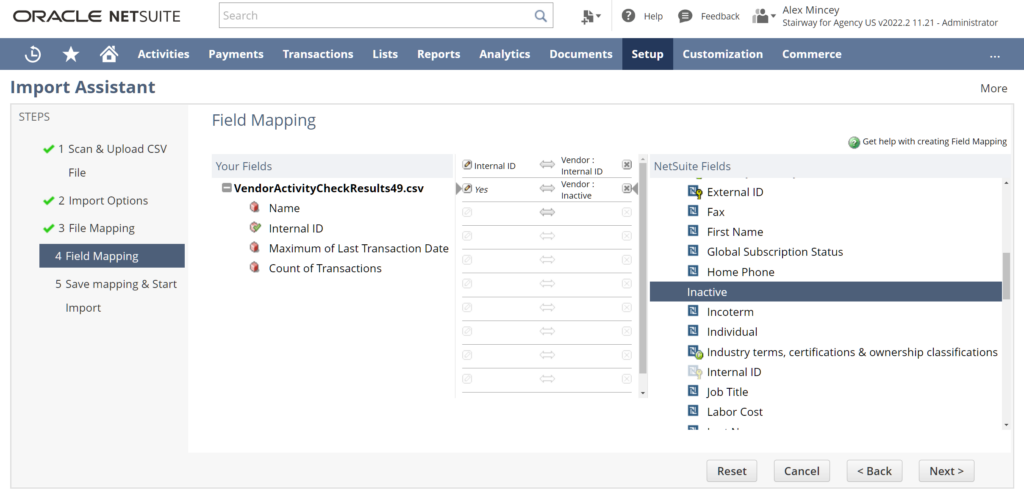
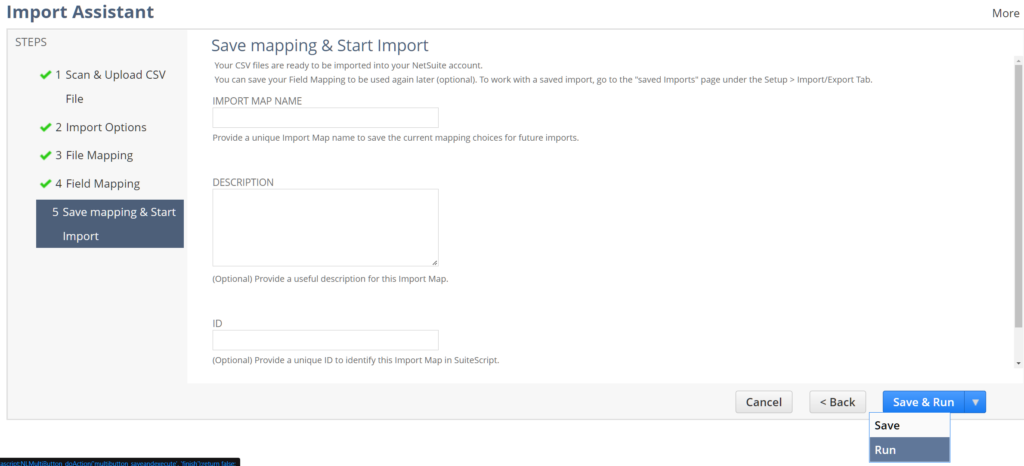
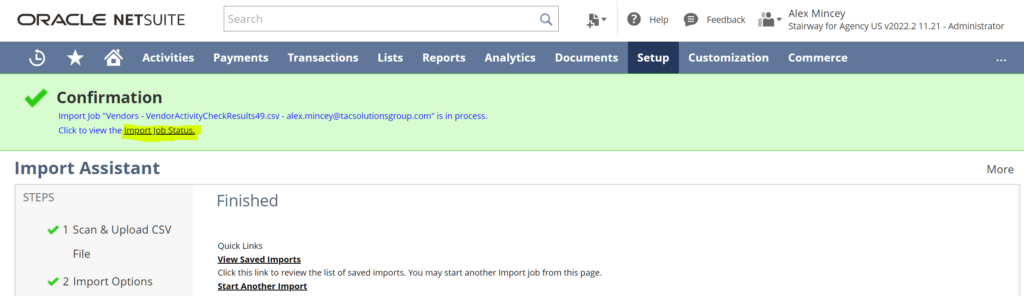
As businesses expand their digital ecosystems, connecting systems with external applications becomes essential. NetSuite provides tools that enable external systems to connect and exchange data securely, with the Integration record at the core of this process. In this article, we’ll provide a step-by-step guide and share best practices for creating an Integration record in NetSuite, which serves as a key component of SuiteTalk.

OpenAir Integrations

How to Remove SuiteSignOn Dependency for Seamless OpenAir Integrations

NetSuite is phasing out the outdated and insecure Outbound Single Sign-On feature, SuiteSignOn, making it necessary for users to adopt modern authentication methods to maintain seamless OpenAir integrations. While the upgrade process may seem complex when handled directly in the platform, with the right guidance it becomes a clear and manageable transition. By removing SuiteSignOn and enabling OAuth-based authentication, you strengthen system security, prevent unauthorized access, and ensure your integrations run smoothly. Without this update, your system may generate script errors that disrupt workflows and cause integration failures. This guide walks you through each step needed to remove SuiteSignOn dependency and establish a secure, uninterrupted NetSuite <> OpenAir integration.

Unlock the Full Power of NetSuite with Custom Fields

We all know that NetSuite is a powerful tool out of the box. However, for it to be truly effective for your business, it does require customization. One of the most common customizations within NetSuite is the custom field. This blog post will be going over what they are and how you can create them.

Understand Business Complexity

Our combined experiences in diverse industries provide us with unique insights allowing our NetSuite Consultants to provide solutions to multifaceted problems.It has been our experience that often times people look for the easiest solution instead of facing the problems head-on. This creates manual workaround and loss of man hours that contribute to increased labor costs to resolve systematic problems.

Request a demo

Fill out the form below and our team will be in touch shortly.