TAC Logo

The Ultimate Step-by-Step Guide to Mass Deletion in NetSuite

Mass delete files
In the landscape of NetSuite’s immense range of features, often times the easiest actions can become cumbersome. By leveraging mass deletion, a skill that only a few truly understand, users can do away with deleting records one by one. The capability to mass delete transactional records provide increased proficiency for those seeking efficient ways to maintain data integrity. Join us as we explore NetSuite’s record management, where we will help you learn the secrets of mass deletion.

The Challenge

Imagine this scenario; Your NetSuite dashboard is inundated with a tsunami of incorrect Sales Orders resulting from an error during a recent import. Navigating through this flood of data feels like searching for a needle in a haystack and can cause a tremendous amount of stress on your team, and a decrease in customer satisfaction. It is in situations like these that the true potential of NetSuite’s ability to handle deletions becomes evident. 

The Solution

NetSuite’s inline editing feature, known for its ability in executing mass deletions, serves as a powerful tool for any user. However, it is important to note that this feature should not be your first line of defense; rather it should be used strategically and only be pulled out in the scenarios like the one mentioned above. Lets explore the process step by step, starting with enabling the features, then carrying out a mass deletion, and finally reviewing all the deleted records along with their respective reasons. 

Step 1. Enable the Inline Editing Feature

Navigate to Setup > Company > Enable Features and enable the Inline Editing feature under the Data Management section. 

inline editing 1

2. Enable the Use Deletion Reason Feature

Navigate to Setup > Company > Enable Features and enable the Use Deletion Reason feature under the ERP General section. 

use deletion reason - mass deletion

3. Click Save to Finalize the Enabling of the Features Above

4. Customize your Deletion Reason Options

Once you enable the Use Deletion Reason feature, NetSuite will create 2 deletion reasons that consist of “Original Document Damaged” and “Other”. You can add more deletion reasons to fit your business by following the steps below. 

  1. Navigate to Setup > Accounting > Accounting Lists > New 
setup_customizations
  1. Select Transaction Deletion Reason 
transaction deletion reason
  1. Enter the desired Transaction Deletion Reason
transaction deletion reason
  1. Click Save

5. Look up Transaction List and Perform Your Mass Deletion

In this scenario, we will be looking up the Sales Orders that were incorrectly imported.  

  1. Access the transaction list in NetSuite by navigating to Transaction > Sales > Enter Sales Orders > List 
list - mass deletion
  1. Make sure inline editing is turned on in your transaction view by clicking the Edit switch at the top of the page. The switch will have a green checkmark when it is turned on.  
selected edit box - mass deletion
  1. Click AdobeStock 523199806 e1701840370352 key in the Memo column and drag down to select the transactions to be deleted. You can also click and select individual transactions to delete. 
  2. A selection box will appear around your chosen transactions. 
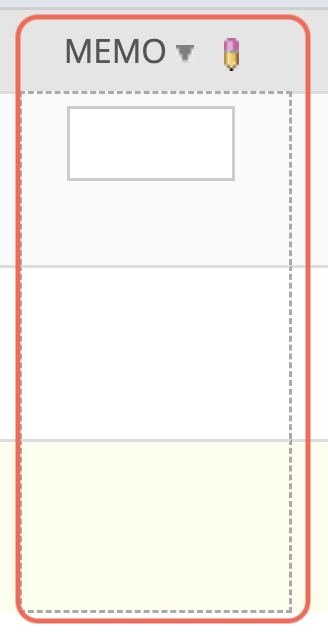
memo - mass deletion
  1. Press the AdobeStock 523199384 e1701841347295 
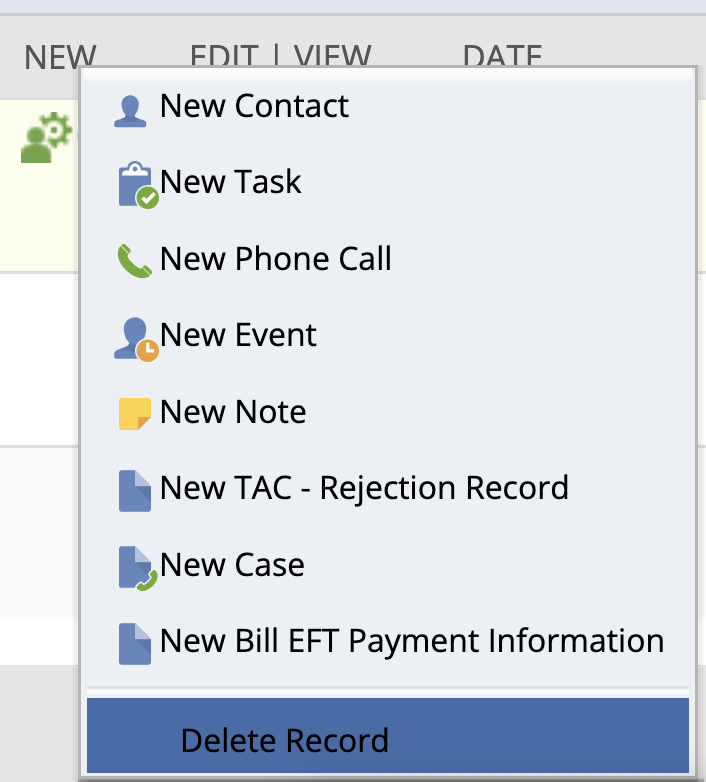
key on your keyboard to initiate deletion or hover over the new column gear icon and select Delete Record. 
Delete Record
  1. Choose a deletion reason and add a memo if needed. Click Delete to confirm and say goodbye to those transactions. 
reason for deletion - mass deletion

6. Review Deleted Transactions in the Transaction Numbering Audit Log

The log reveals a story of deleted records providing insights, into why they were removed and the person responsible for deleting the transactions. 

Navigate to Transactions > Management > Transaction Numbering Audit Log  

transaction numbering audit log
transaction numbering audit log example

In Summary:

Although inline editing allows for mass deletion, it is important to handle this feature with caution. Deleting records should be considered a last resort. Users must be careful to ensure data integrity is maintained. Including reasons for deletion adds transparency to the process and establishes an audit trail for accountability. It is crucial to remember that responsible data management is essential for a seamless experience with NetSuite.

How TAC Can Help

As you embark on the journey of leveraging NetSuite’s powerful inline editing feature for mass deletions, remember that you’re never alone in this adventure. Our team of certified consultants is not just a resource; we’re your dedicated partners, ready to stand by you at every step. Whether you’re a seasoned NetSuite user or just starting out, your questions and concerns matter to us. Feel free to reach out, and let’s navigate this path together, turning challenges into opportunities for growth.

Share:

More Posts you may like:

user access

The Ultimate Step-by-Step Guide to Adding NetSuite Users and Granting User Access

Welcome to TAC Solutions Groups guide on creating NetSuite users and utilizing two-factor authentication. Here you will find key details on creating users and giving user access to your NetSuite environment. We will also look at two-factor authentication, how it affects users’ experience, and how it improves the security of your system.

Understand Business Complexity

Our combined experiences in diverse industries provide us with unique insights allowing our NetSuite Consultants to provide solutions to multifaceted problems.It has been our experience that often times people look for the easiest solution instead of facing the problems head-on. This creates manual workaround and loss of man hours that contribute to increased labor costs to resolve systematic problems.

Request a demo

Fill out the form below and our team will be in touch shortly.